
Data Recorder SR-1000 Operation Manual (1983)
- Pages
- 12
- Source
- scanned, Data_Recorder_SR-1000_Operation_Manual_1983_Au_color.pdf
- Per page
- about 35 KB — only what you read
- Text layer
- yes — searchable
DATA RECORDER
Operation Manual
This DATA Recorder has been developed for exclusive use on the SEGA persona! computer
MODEL SC-3000.
Before operating please read this manual thoroughly and retain for future reference.
PRECAUTIONS
Care
should
be
taken
not
to
use
or
leave the SEGA Data Recorder
at places exposed to
direct
sunlight for a long time or near
a heating unit or places subjected to extremely high temperatures
as
in
a
car
with
windows
closed,
etc.,
or
very damp
places.
(Deformation,
discoloration, and
irregularities may occur
if the above-mentioned care
is not taken.)
*
What
is
recorded
by your
tape
recorder should
not
be
utilized without the
copyright
holder's
approval except in the case where
it
is for your own personal use.
i CONNECTION TO
SEGA'S PERSONAL COMPUTER
(MODEL
SC-3000)*i
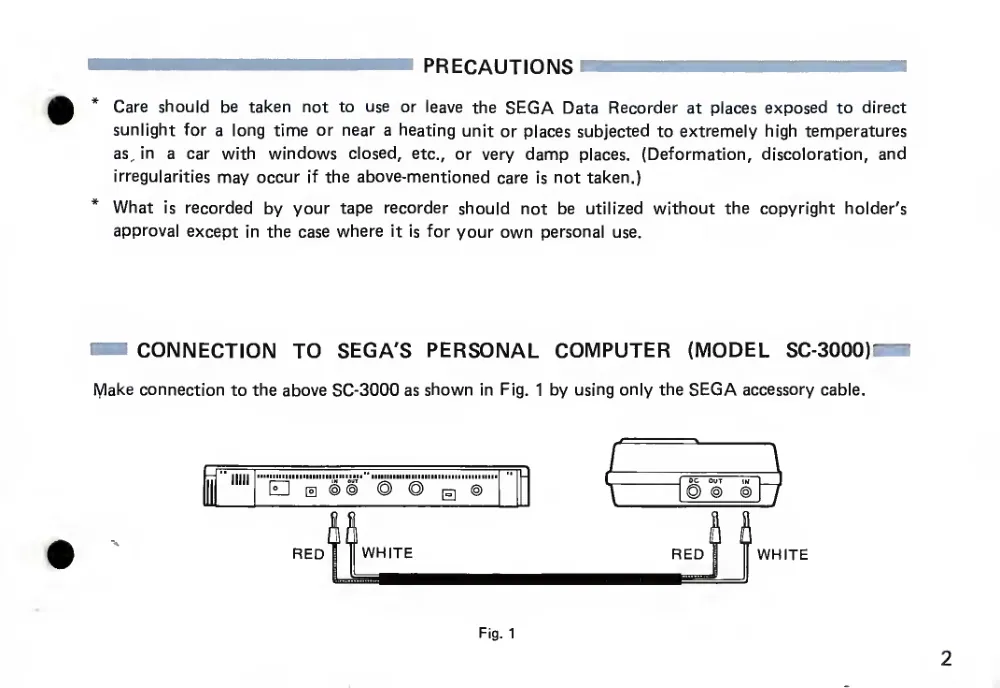
Make connection to the above SC-3000 as shown in Fig.
1 by using only the SEGA accessory cable.
Fig.
1
2
NAMES OF PARTS
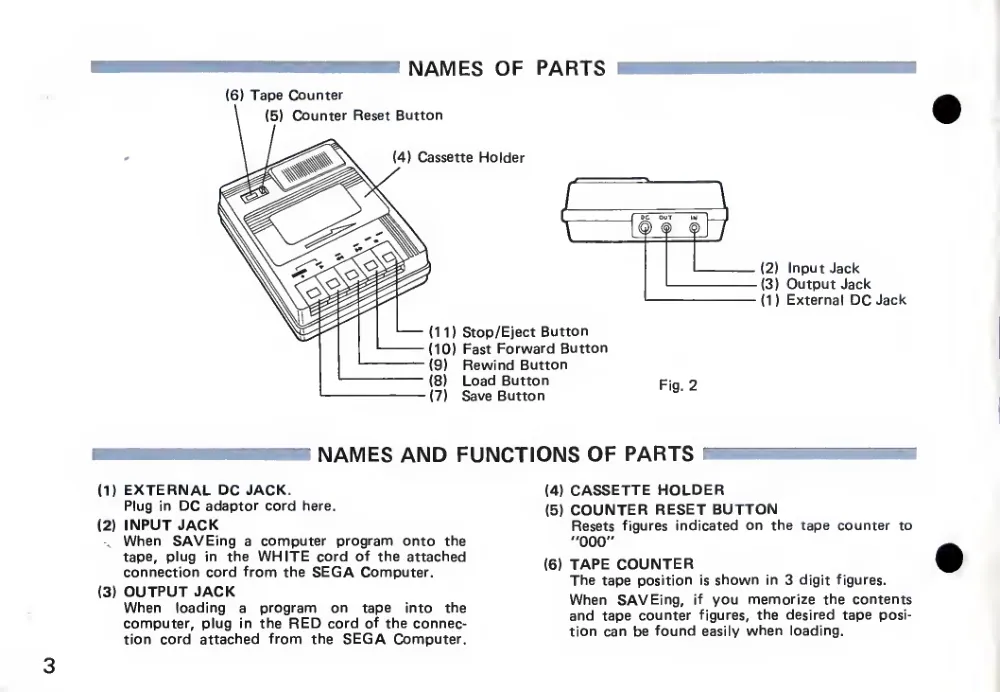
(6) Tape Counter
(2 )
-(3)
( 1
)
Input Jack
Output Jack
External DC Jack
NAMES AND FUNCTIONS OF PARTS
(1) EXTERNAL DC JACK.
Plug
in DC adaptor cord here.
(2) INPUT JACK
When
SAVEing
a computer program onto
the
tape,
plug
in
the WHITE cord of the attached
connection cord from the SEGA Computer.
(3) OUTPUT JACK
When
loading
a
program
on
tape
into
the
computer, plug
in the RED cord of the connec-
tion
cord
attached from
the SEGA Computer.
(4) CASSETTE HOLDER
(5) COUNTER RESET BUTTON
Resets figures indicated on the tape counter to
"000 ”
(6) TAPE COUNTER
The tape position
is shown
in 3 digit figures.
When
SAVEing,
if you
memorize the contents
and tape counter
figures, the desired tape
posi-
tion can be found easily when loading.
(7) SAVE BUTTON
This button
has a "one-touch"
recording
func-
tion,
so
when
SAVEing,
if
it
is
pressed,
the
LOAD Button also goes down at the same time.
(8) LOAD BUTTON
Press this button when loading.
(9) REWIND BUTTON (REW)
'
Press this button for rewinding the tape rapidly
after
stopping
the movement
of
the
tape
by
pressing the STOP Button
(11).
(10) FAST FORWARD BUTTON (FF)
Press this button for fast forwarding of the tape
after
stopping
the
movement
of
the
tape
by
pressing the STOP Button
(11).
(11) STOP/EJECT BUTTON
When
this
button
is
pressed, the movement of
the
tape
stops
and
the
cassette
holder opens
when the button
is pressed again.
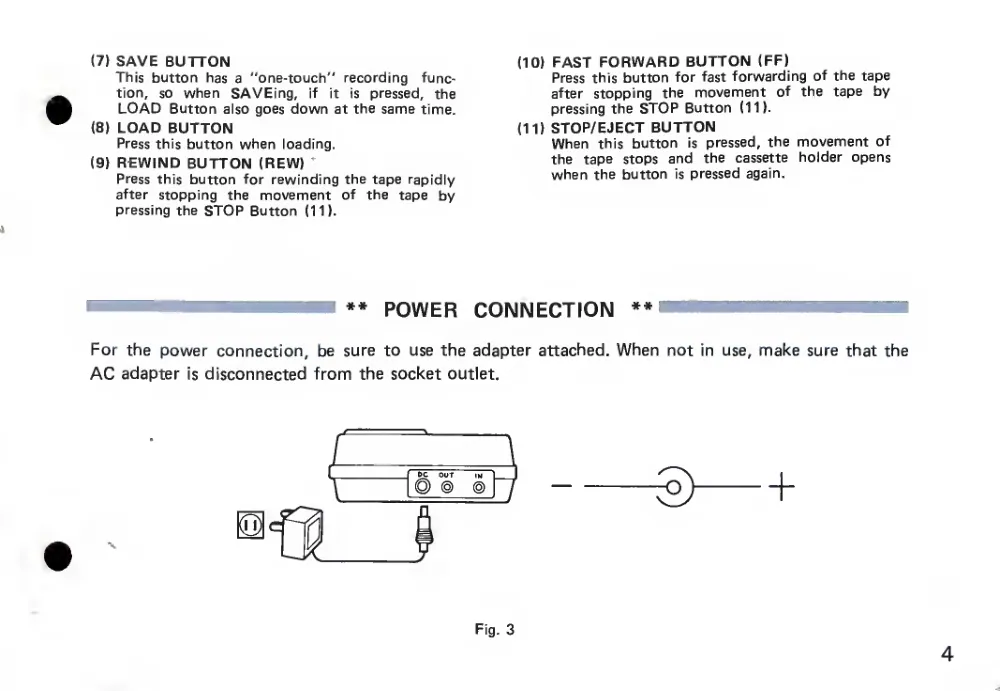
** POWER CONNECTION
**
For the power connection, be sure to
use the adapter attached. When not in use, make sure that the
AC adapter
is disconnected from the socket outlet. —s>—
+
Fig. 3
4
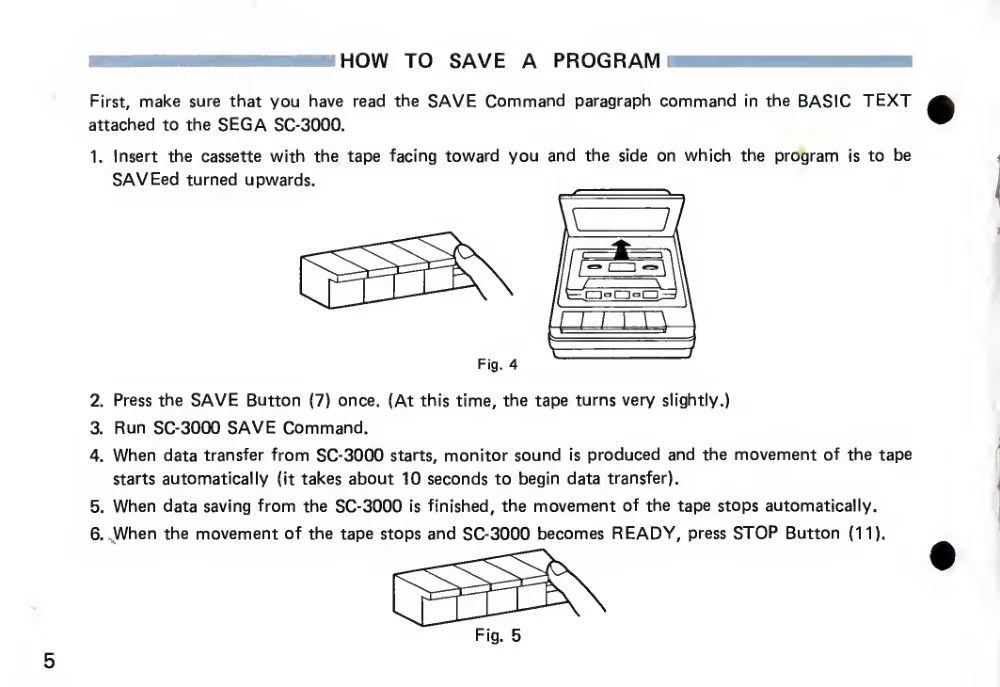
HOW TO SAVE A PROGRAM
First, make sure that you have
read the SAVE Command
paragraph command
in the BASIC TEXT
attached to the SEGA SC-3000.
1.
Insert
the cassette with the tape
facing toward you and the
side on which the program
is to
be
SAVEed turned upwards.
Fig. 4
2.
Press the SAVE Button
(7) once. (At this time, the tape turns very slightly.)
3. Run SC-3000 SAVE Command.
4. When data transfer from SC-3000 starts, monitor sound
is produced and the movement of the tape
starts automatically
(it takes about 10 seconds to begin data transfer).
5. When data saving from the SC-3000
is finished, the movement of the tape stops automatically.
6.
-When the movement of the tape stops and SC-3000 becomes READY, press STOP Button
(11).
Fig. 5
5
*
After
program
SAVEing,
be
sure
to VERIFY
(this
refers
to
the
verification
program in the personal computer and the program SAVEed onto the cassette tape).
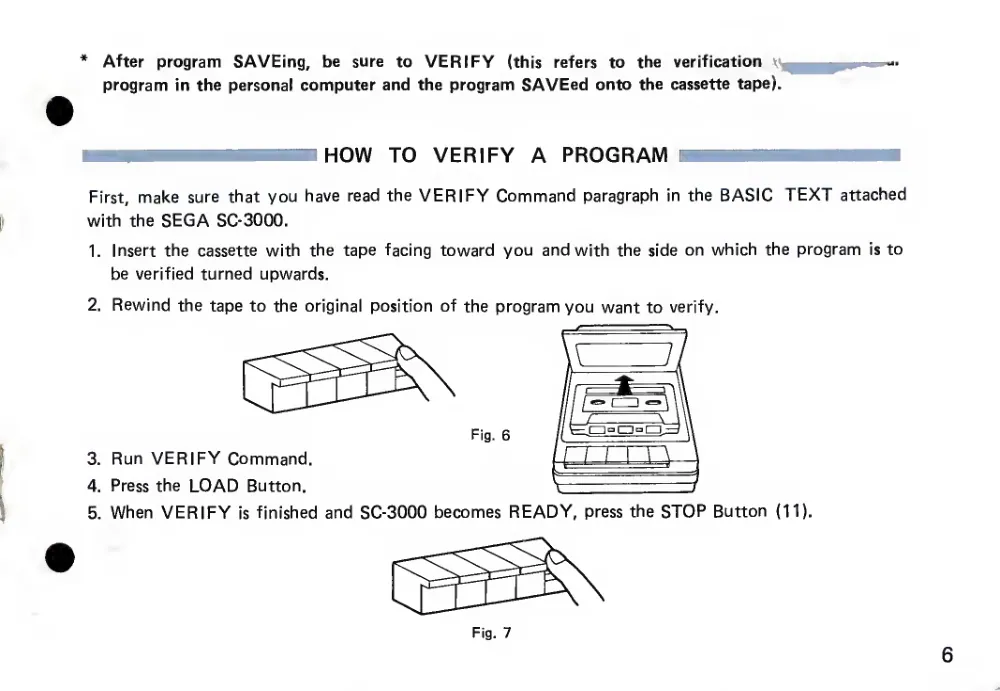
HOW TO VERIFY A PROGRAM
First, make sure that you have read the VERIFY Command paragraph
in the BASIC TEXT attached
with the SEGA SC- 3000.
1.
Insert the
cassette with the tape facing toward you and with the side on which the program
is to
be verified turned upwards.
2.
Rewind the tape to the original position of the program you want to verify.
5. When VERIFY
is finished and SC-3000 becomes READY, press the STOP Button
(11).
Fig. 1
6
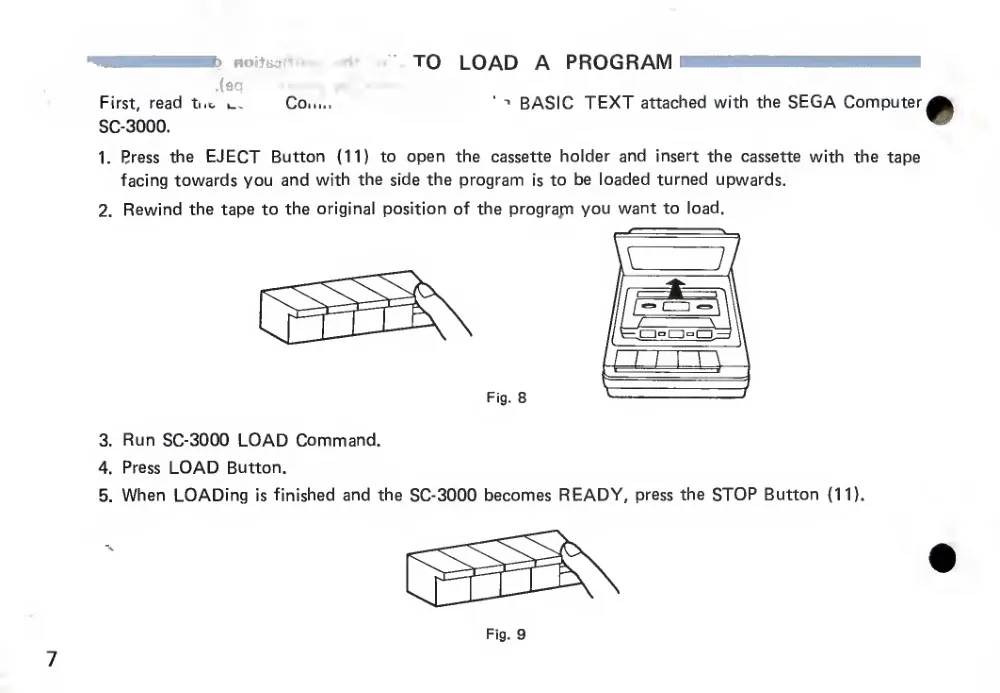
TO
LOAD A PROGRAM
noi
First, read
ti.c
(sr
Coi,
BASIC TEXT attached with the SEGA Computer
i
SC-3000.
1.
Press
the EJECT
Button
(11)
to open
the
cassette holder and
insert the
cassette with
the tape
facing towards you and with the side the program
is to be loaded turned upwards.
2.
Rewind the tape to the original position of the program you want to load.
3. Run SC-3000 LOAD Command.
4.
Press LOAD Button.
5. When LOADing
is finished and the SC-3000 becomes READY, press the STOP Button
(11).
7
Fig. 9
PRECAUTIONS_1_—
Before
inserting
the
cassette tape
into the tape
recorder, make
sure that the tape
in the
cassette
is
not
slack
to
avoid
the
tape
breaking
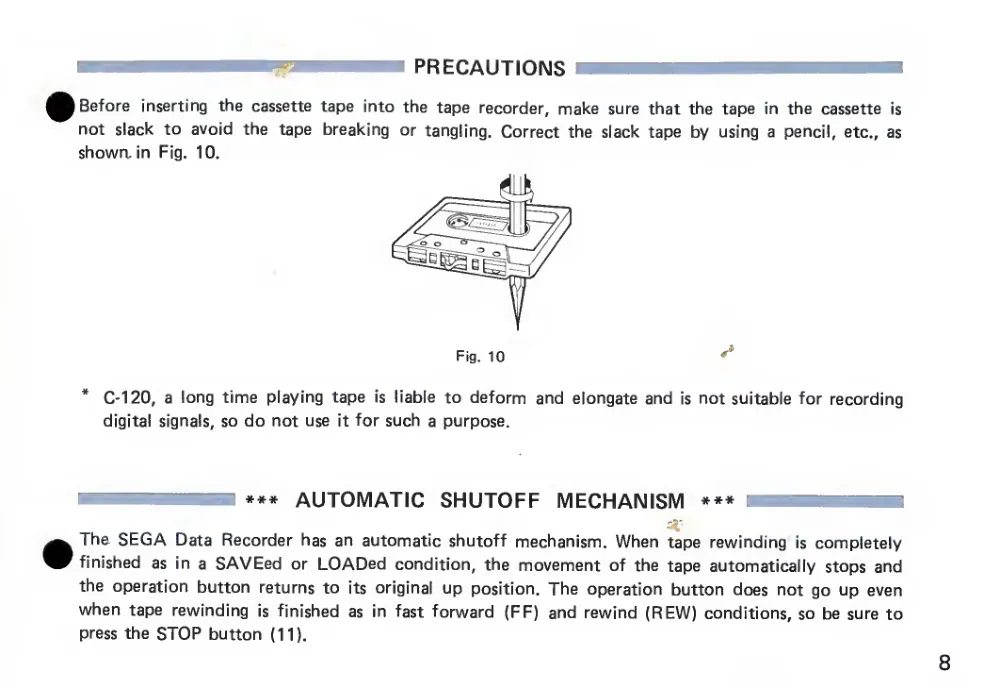
or tangling. Correct the
slack tape by
using
a
pencil,
etc.,
as
showa in
Fig.
10.
Fig. 10
*
C-120,
a long time playing tape
is
liable to deform and elongate and
is not suitable for recording
digital signals, so do not use
it for such a purpose.
*** AUTOMATIC SHUTOFF MECHANISM
***
The SEGA Data Recorder has an automatic shutoff mechanism. When tape rewinding
is completely
finished
as
in
a SAVEed or LOADed condition, the movement of the tape automatically stops and
the operation button
returns to
its
original up position. The operation button does not go up even
when tape rewinding
is finished
as
in
fast forward
(FF) and rewind (REW) conditions, so be sure to
press the STOP button
(11).
***
FOR YOUR
INFORMATION
***
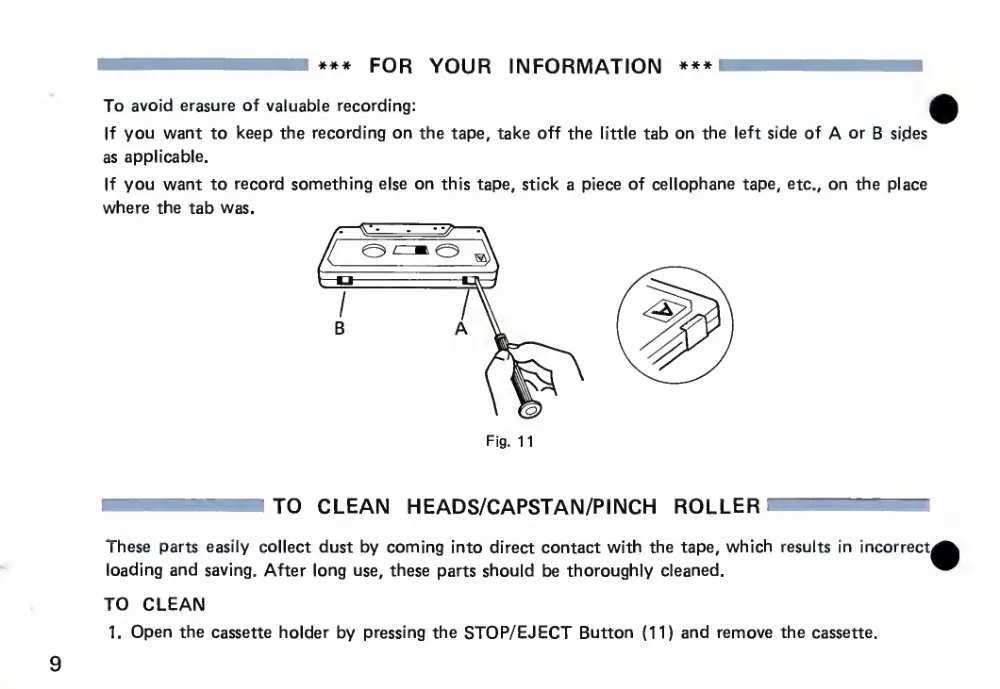
To avoid erasure of valuable recording:
If you want to keep the recording on the tape, take off the
little tab on the
left side of A or B sides
as applicable.
If you want to record something else on this tape, stick a piece of cellophane tape, etc., on the place
where the tab was.
Fig.
11
TO CLEAN
HEADS/CAPSTAN/PINCH
ROLLER
These parts easily
collect dust by coming into direct contact with the tape, which
results
in incorrect
loading and saving. After long use, these parts should be thoroughly cleaned.
TO CLEAN
1. Open the cassette holder by pressing the STOP/EJECT Button
(11) and remove the cassette.
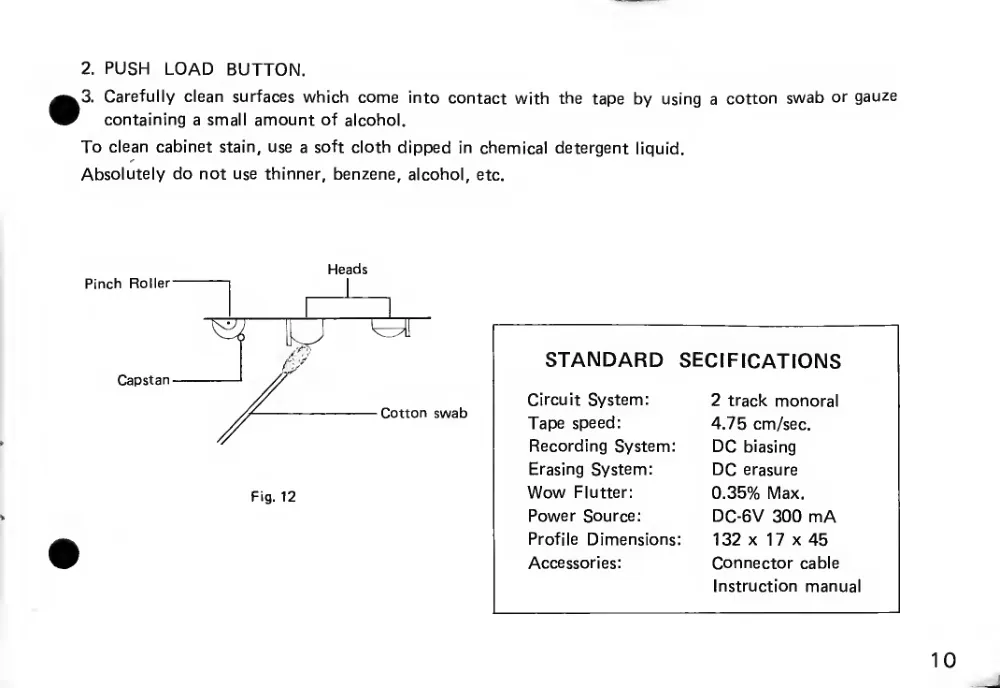
2. PUSH
LOAD BUTTON.
.3.
Carefully clean
surfaces which come
into contact with
the tape by
using
a cotton swab or gauze
*
containing a small amount of alcohol.
To clean cabinet stain, use
a soft cloth dipped
in chemical detergent liquid.
Absolutely do not use thinner, benzene, alcohol, etc.
STANDARD
SECIFICATIONS
Circuit System;
2 track monoral
Tape speed:
4.75 cm/sec.
Recording System:
DC biasing
Erasing System:
DC erasure
Wow
Flutter:
0.35% Max.
Power Source:
DC-6V 300 mA
Profile Dimensions
132 X 17 X 45
Accessories:
Connector cable
Instruction manual
10
Sega Enterprises, Ltd.
2-12, Haneda 1-chome
Ota-ku, Tokyo 144, Japan
©SEGA 1983 PRINTED IN JAPAN