
SP-400 4 Color Plotter Printer
- Pages
- 32
- Source
- scanned, SP-400_4_Color_Plotter_Printer_19xx_NZ.pdf
- Per page
- about 52 KB — only what you read
- Text layer
- yes — searchable
4 COLOR PLOTTER PRINTER
for SC-3000 personal computer
Operation Manual
Introduction
CVingratuIatinns for selecting this high-quality,
luw-cost color
ploiier/priiiter!
We know this Printer
is the ideal output device
for home or business
use.
Its
special
features
include:
• A set of simple instructions that allow you
to change
colors, backspace the pens, reverse feed the paper, and
• Four color printout
(black, blue, green, and red
),
• Standard roll paper
(4.48‘ wide by 56meter
long).
• 38
character
per line
printing.
Contents
1 General Description
2 Settins Up
3 Background Information
4 Using
the
plotter/printer
Control Codes
Graphic Commands
3 Specifications
Appendix A / Sample Programs
Appendix B
Graphic Commands Summary
Appendix C
f ASCII
Character Set
Appendix D / Programming
Notice

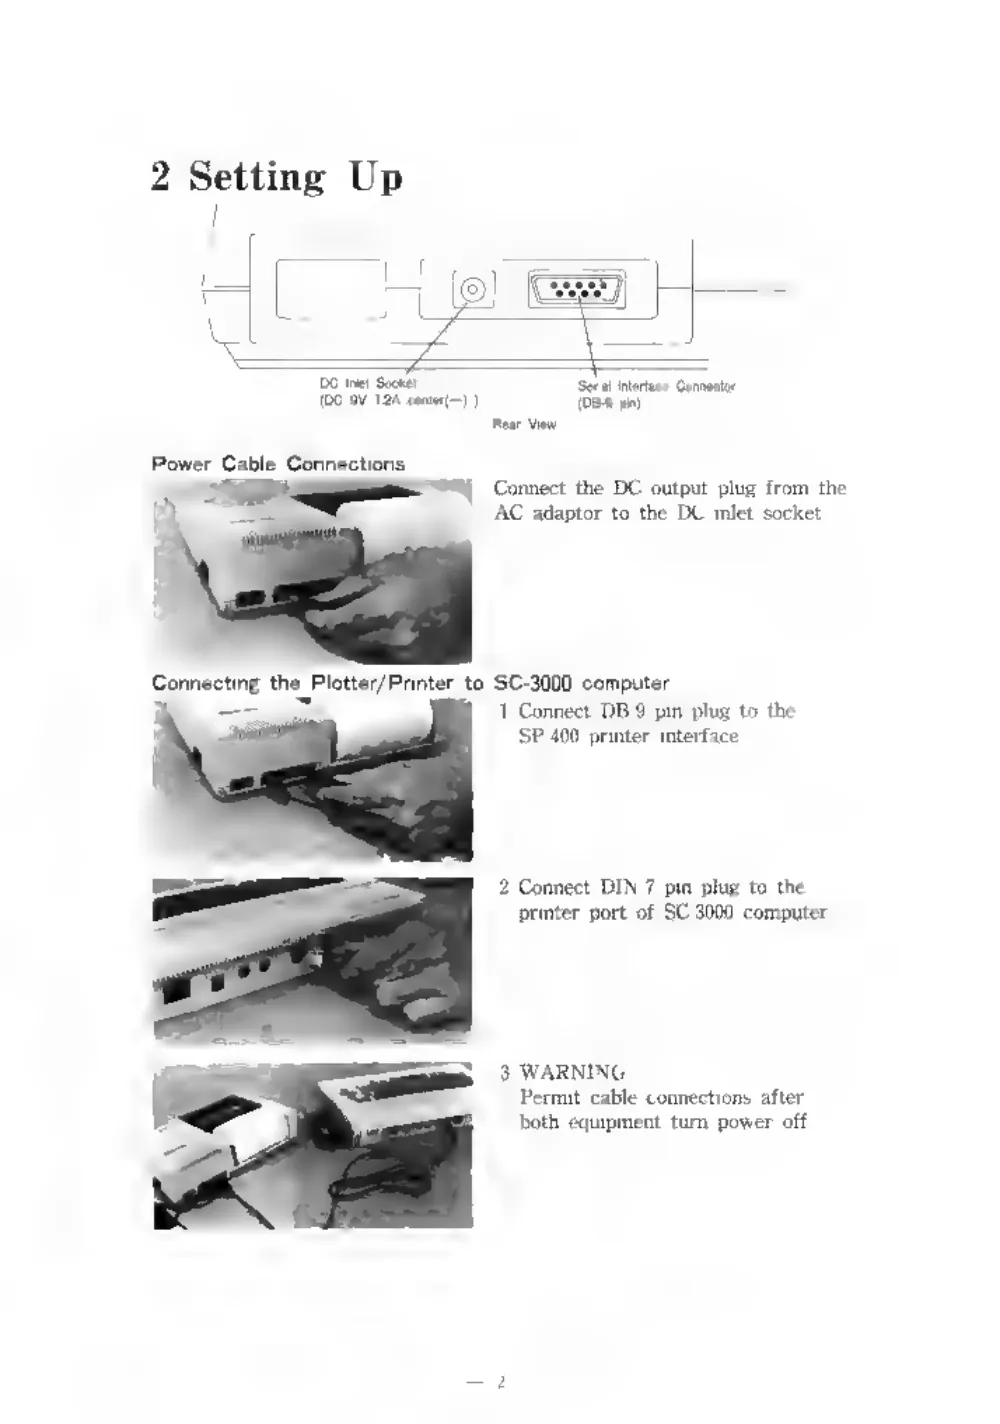
2 Setting Up
meet the DC output plug from
adaptor to the DC
inJel socke'
C-3000 computer
Connect DB-9 pin plug (o the
SP-400 printer
interface.
Connect DIN-7 pin plug
to the
printer port
of SC-SOOC computer
WARNINC,
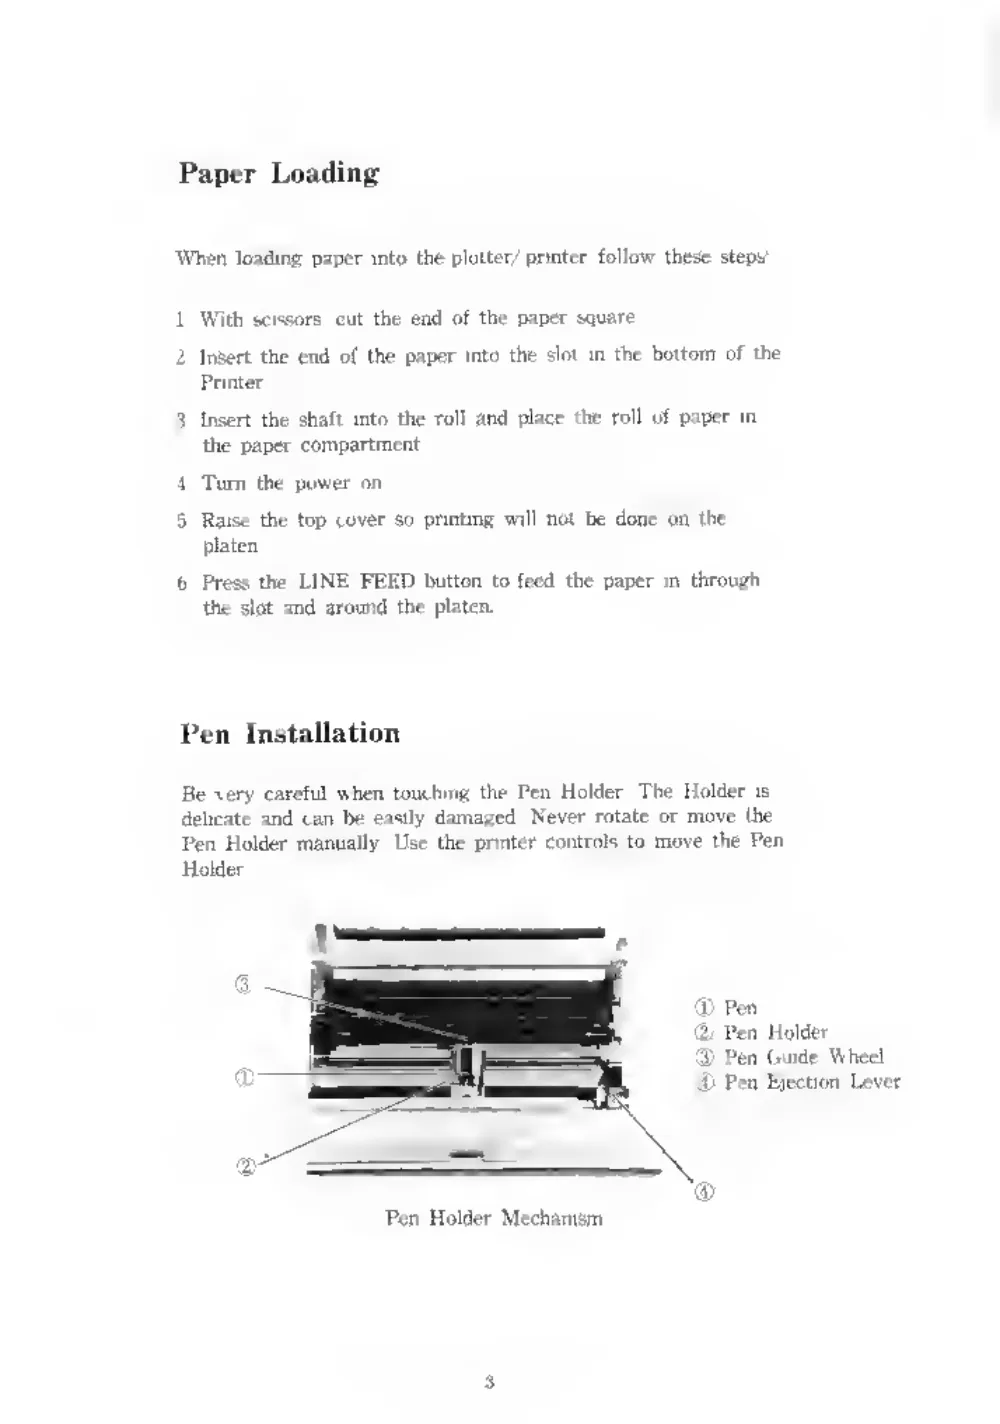
Paper
Loading:
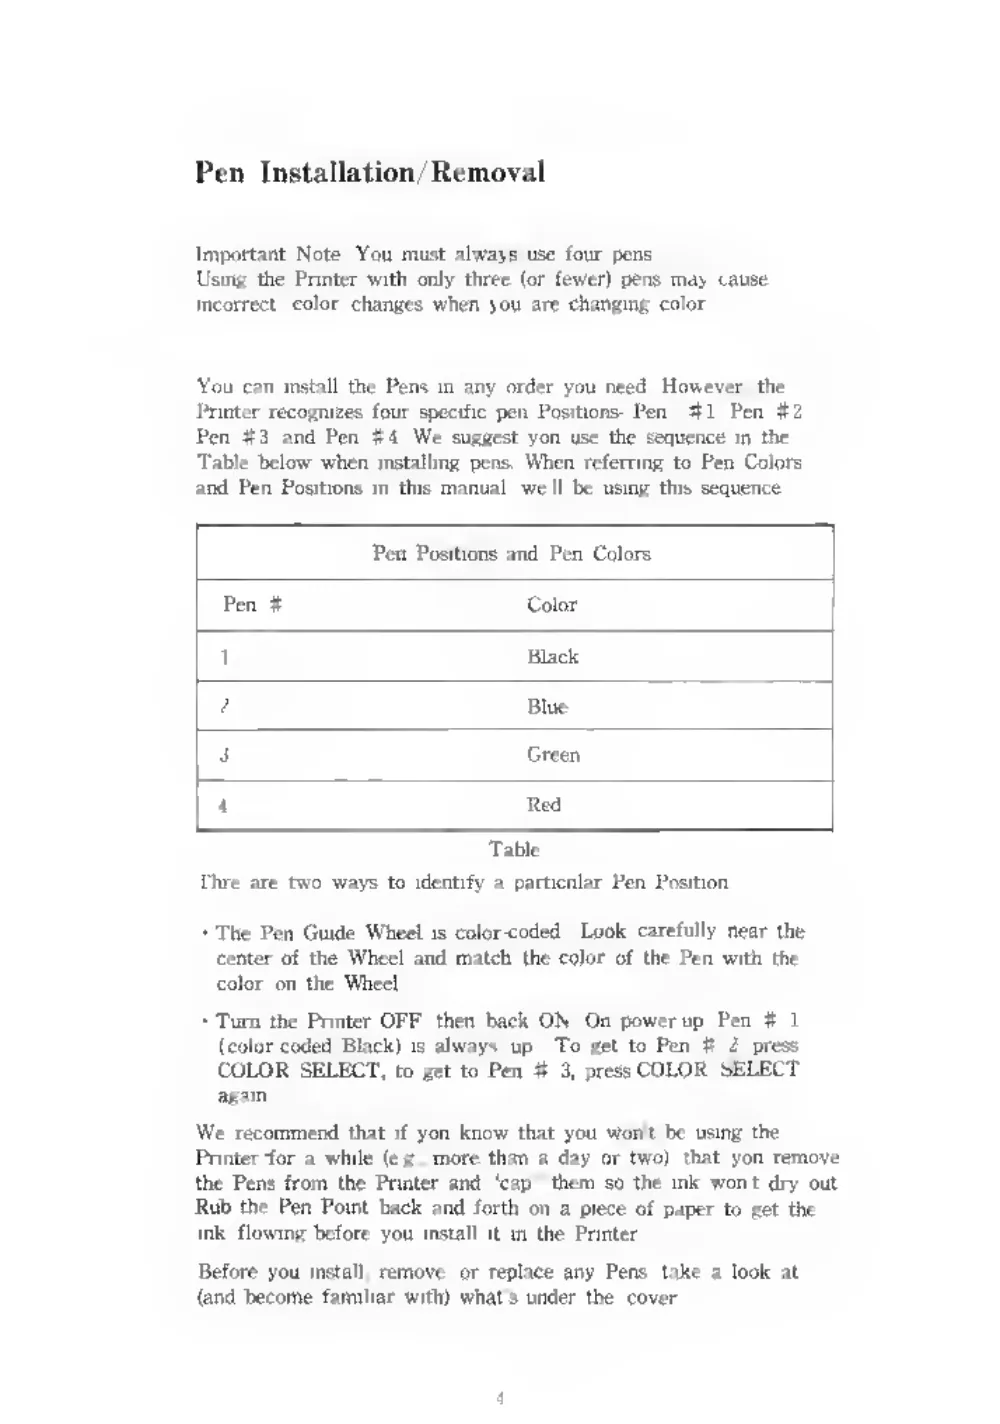
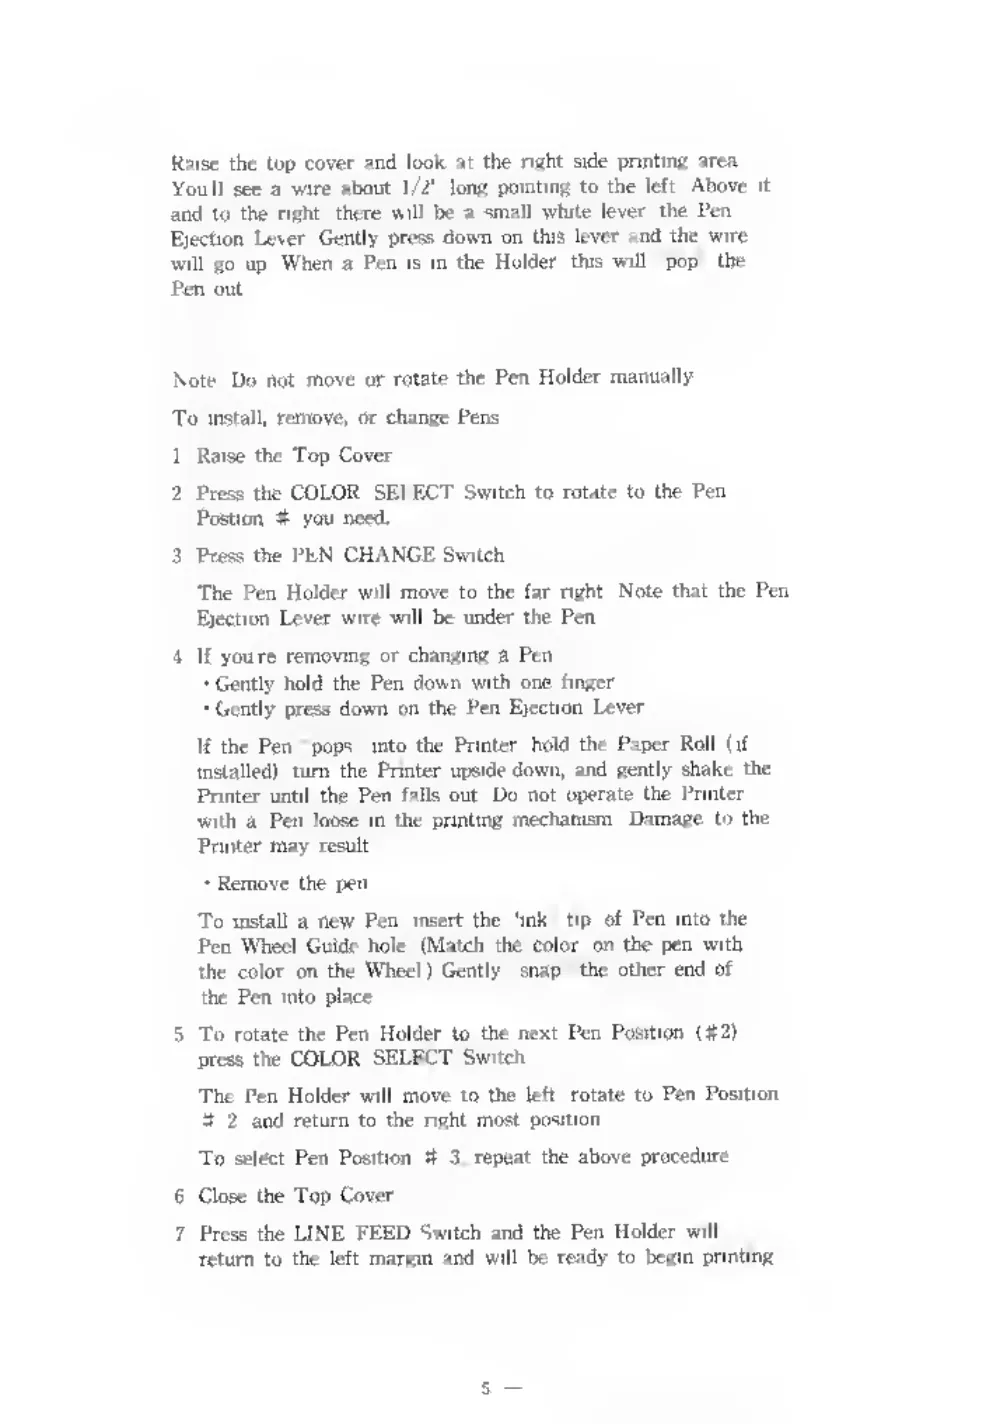
Pen
Installation Removal
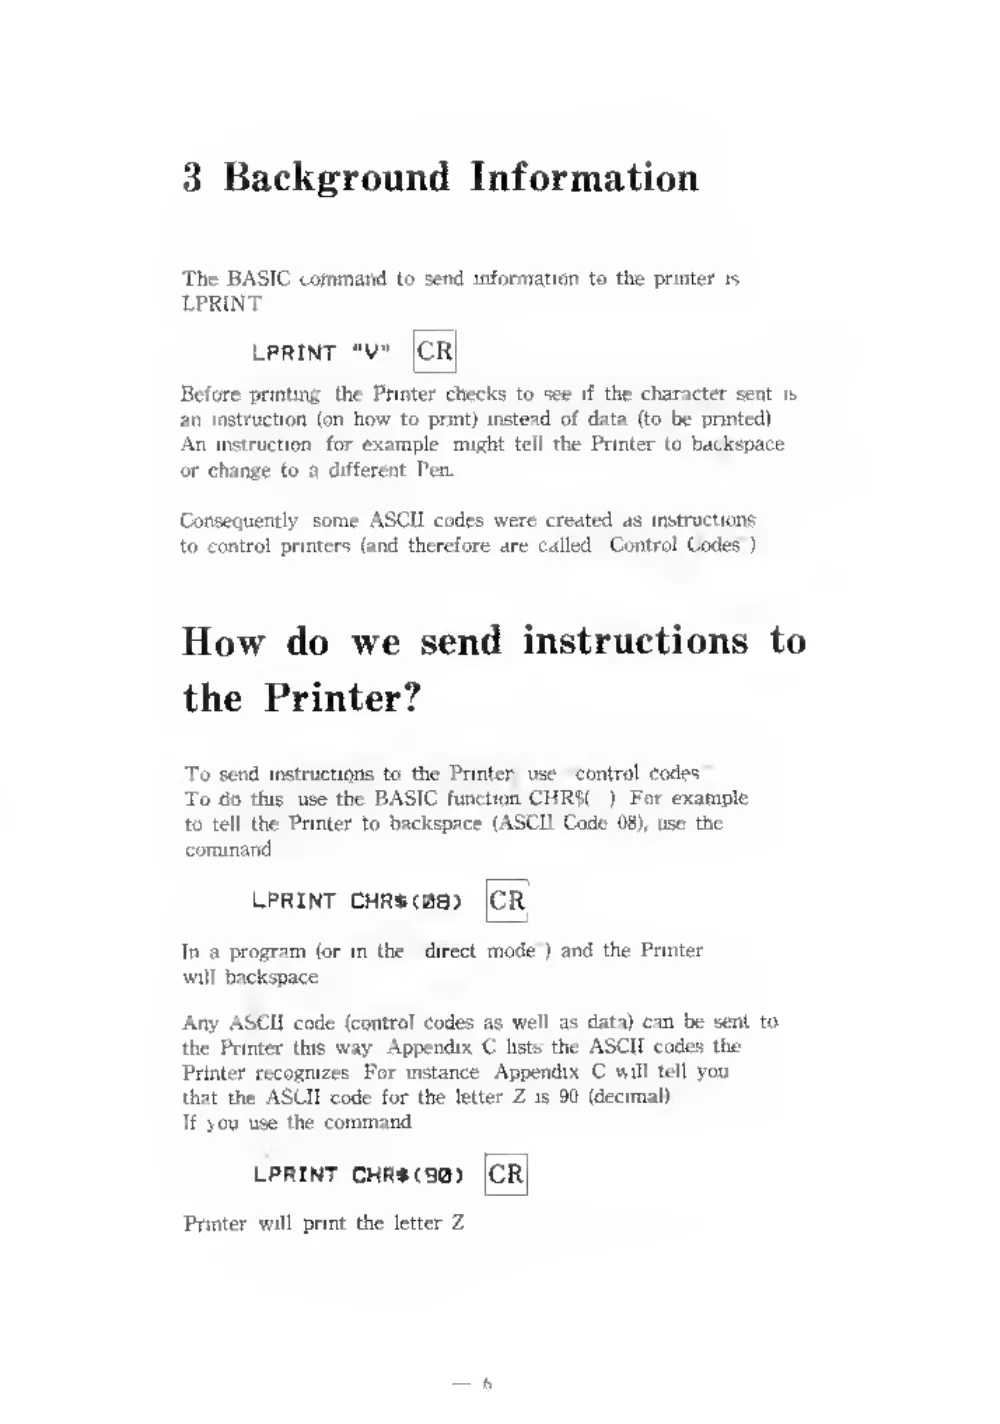
3 Background Information
The BASIC conmiand to send information
to the printer
is
LPRINT.
LPRINT
"V"
Before
printing,
the Printer checks to see
if the character sent
is
an
instruction
(on how to
print) instead of data
(to be
printed).
An
instruction, for example, might
teil the Printer
to backspace
or change
to
a different Pen.
ConseQuently, some ASCII codes were created as instniciiuns
to control printers (and therefore are called "Control Codes”).
How do we send instructions to
the Printer?
To send
instructions to the
Printer, use "control
codes.''
To do
this, use the BASIC function CHRS(
). For example,
to
tell
the Printer to backspace (ASCII Code 08),
tise the
coininand;
LPRINT CHR$(08)
In a program
(or
in the
"direct mode') and the Printer
will backspace.
Any ASCII code
(control codes as well
as data) can be sent to
the
Printer
this way, Appendix C
lists the ASCII codes the
Printer recognizes. For instance, Appendix C
will
toll you
that the ASCII code
for the
letter Z
is 90
(decimal).
If you use
the command:
LPflINT CHRSOB)
Printer
will
print the
letter Z.
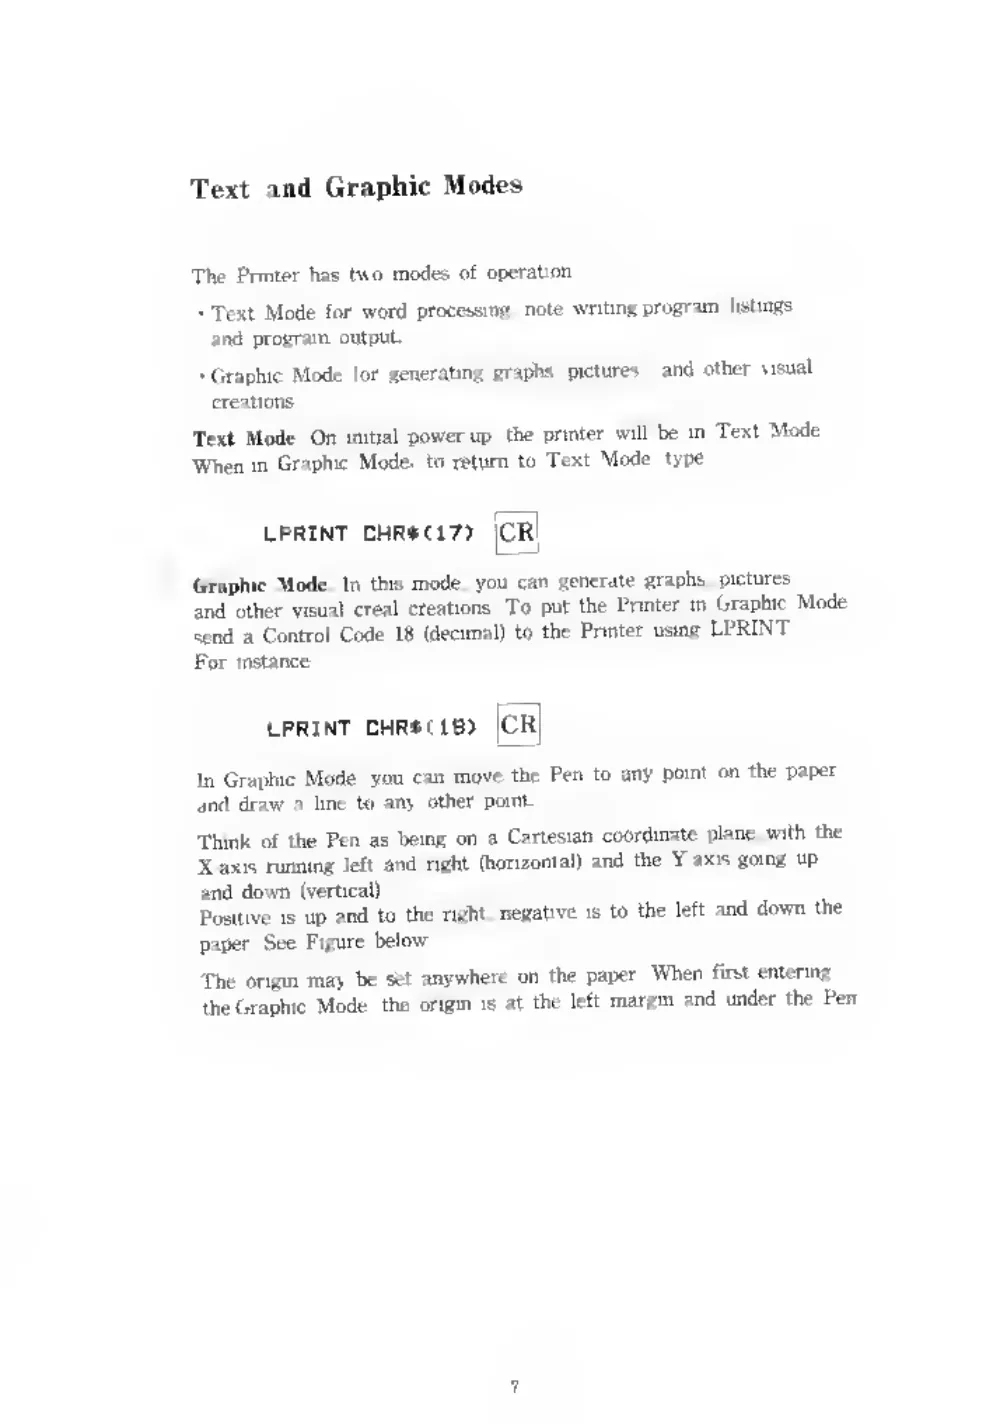
Text and Graphic Modes
The Printer has two modefe of operation:
• TeKt Mode
fi>r word processing, note
writing,prt^gram
listings,
and program output.
• (iraphic Mode
ior generating graphs, pictures
,
and other
visual
Text Mode- On
initial power-up, the printer
will be
in Text Mode.
When in Oraphic Mode,
to return to Text Mode,
type:
(iraphic Mode.
In
this mode, you can generate graphs, pictures
and
other visual creal
creations. To put the Printer
in (iraphic Mode,
send a Control Code
18 (deoimal) to the Printer using LI’RINT.
In Graphic Mode, you can move the Pen to any
point on tne paper
and draw a
line
tti any
other pomi.
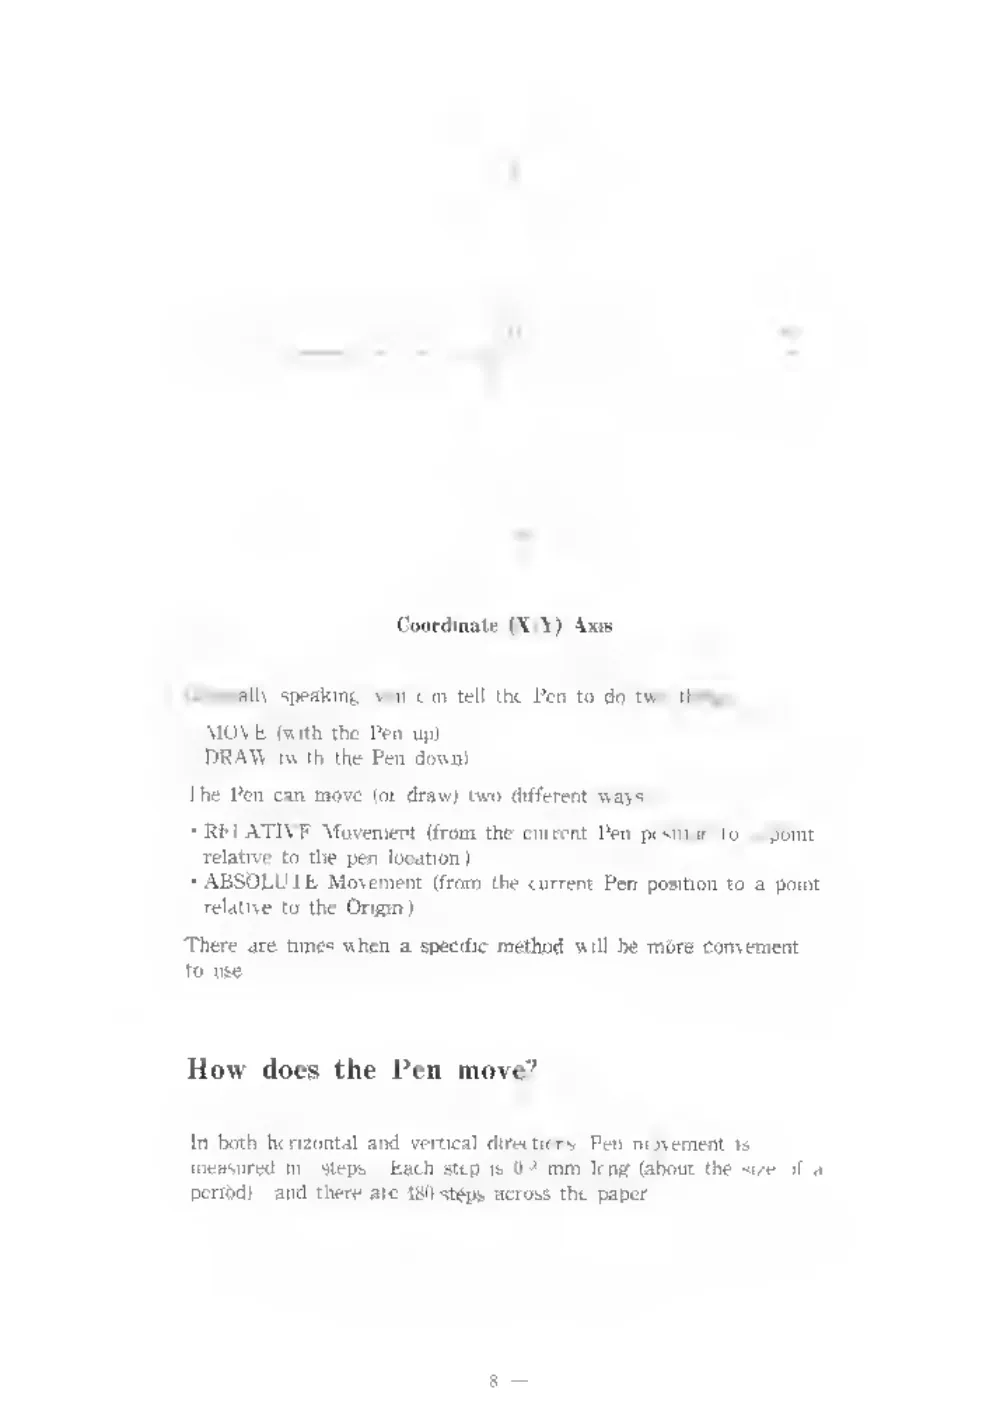
Think of the Pen as being on
a Cartesian coordinate plane, with the
running
left and
right
(horiaontall and the Y-axis going up
)wn
(vcrticall-
e
is up and to the
right, negative
is to the
left and down the
See Figure below.
rigin may be set anywhere or the paper. When
first entering
aphic Mode, the origin
is
at the
left margin and under the
Pen.
(’cardinal
(jojirrally
fiiM’akiny,
yrju can
lell
• MOVE (with the
IVii up)
• DRAW (with
the Pen
dcwii).
('he Pen can move
lot drawl iw
• REI.ATU'K ATuvenien! (from
I
relative
to the pen
location,)
• ABSOLL''I'E IVlovetnent (from
relative
to the Origin)
There are
liinea when a
spectfjc
How does the Pen mf
In both horizontal
aixi
veixical
<
measured
iii
"slepu." Each step
pcrindl,
and there arc Itiilsteps

Care and Maintenance
The Printer
a
very
reliable
unit that
shfiuld give years
of
satisfactory scnhcc.
linwever,
there are some
definite Do’s and
Dniit’sj
• Do not manioulate
the Pen Holder manuaily.
This
wilt
very
easily
cause damage
to the Printer. He esiiecially
careful when inserting
and removing the pens.
' The Pen Holder
is
self-propelled. Do not move
it
manully. To
move
it to the
right
press the PF.N CHANGE
Switch.
To move
it to the
left, press LINE FEED. To rotate the Pen
Holder press CGLOR SELECT.
• Do not oiieraie the Printer without Pens.
Leave a dry or liruken pen
in the Holder until you can replace
il.
• Cap
Ihe pens and return them
to
their case when
the Printer
•Do not alleinpt
to use Pens or paper not
designed
for
(his
Printer.
The
Printer contains
a
self-test routine. To see
all the characters,
lum the Power Switch on while holding down the LINE FEED
Switch. You
will See:
J
Ci*e,-./-01234S6P89:
1 <->70ABCD£FG
HIJKLnN0P0RSTUU'lJ!<Y2[\]r'_'ahcd* l9h Ijk Inns
Pgrstuuwxyzlll'a
Self Test
4 Using the Plotter /Printer
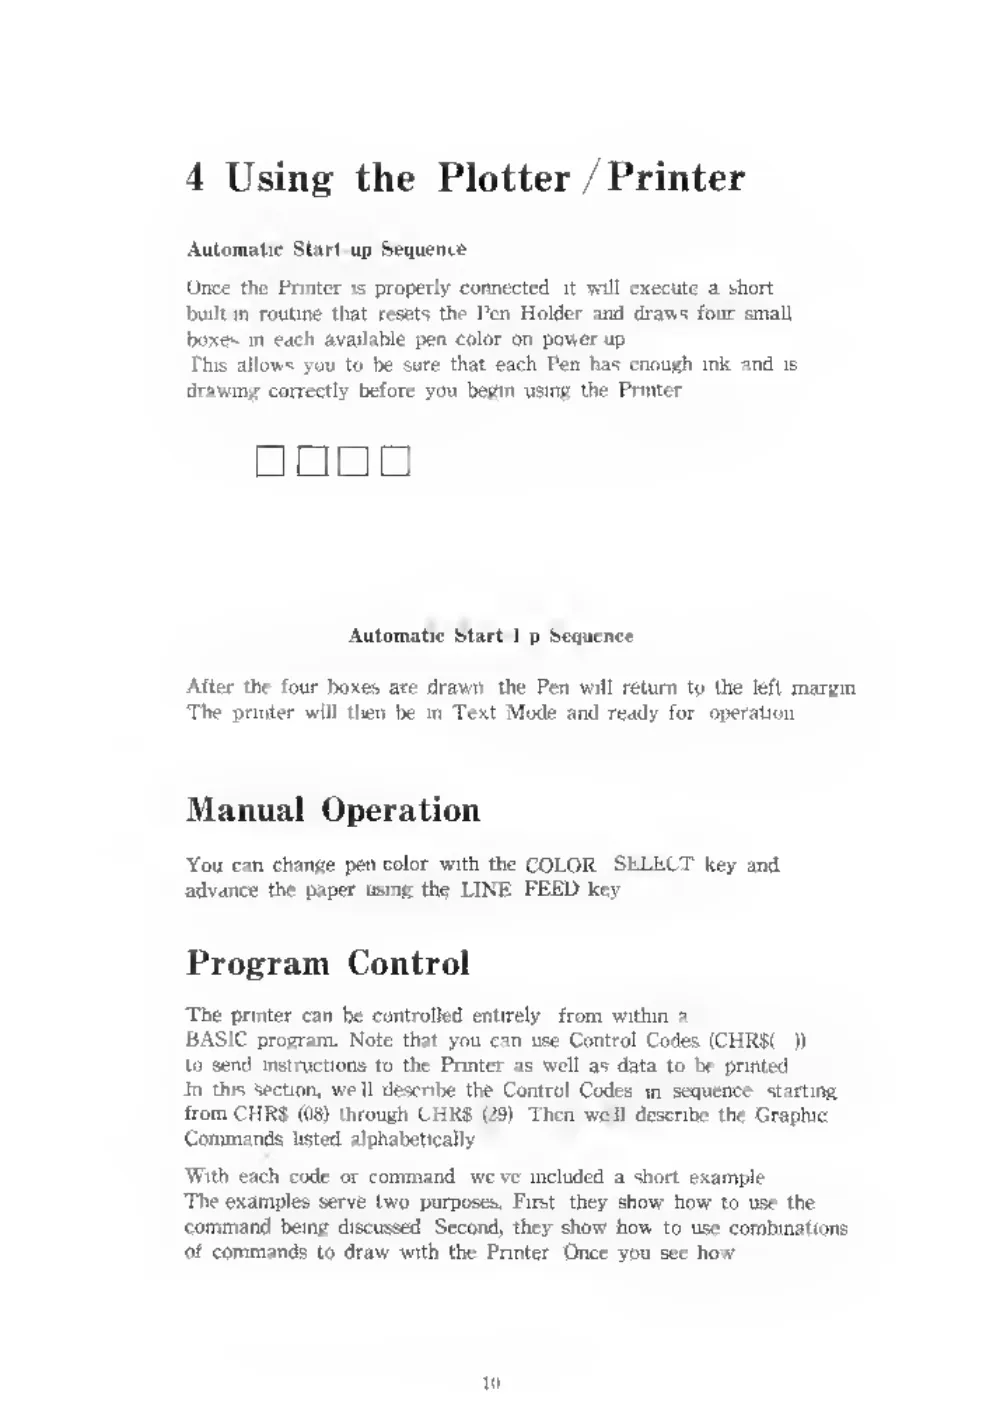
Automatic Start-up Sequence
Uncc the tenter
is properly connected,
it
vrill execute a
short,
buiit-in
routine that
resets the
I’cn Holder and draws four small
boxes
in each availaide pen color on power-up
This allows you
to be sure that each
I’en has enough ink and
is
drawing correctly before you begin using the Printer.
Automatic Start-L'p Sequence
After
the
four Ixixes ate drawn,
the Pen
will
return to the
left
margin.
The
printer
will
llien be
in Text Mode and ready for
oiieratioii.
Manual Operation
You can change pen color with the COLOR
SELECT key and
advance the paper using the LINE FEED key.
Program Control
The printer can be controlled entirely
from within
a
BASIC program. Note that you can use Control Codes (CHR$(
))
lo send
instructions to the Printer as
w*ell as data to be
printeti.
In
this seetinn,
we'll describe the Control Codes
in sequence
starting
fromCHRS
((IS) through CHK$
(US). Then wc'll describe
the Graphic
Commands listed alphabetically.
With each code or command, we’ve included
a short example.
The examples serve two purposes.
First, they show how to use
the
command being discussed. Second, they show how to use combinations
of commands to draw with the
Printer, Once you see how
simple
it
is
to proaram
the
Printer, ynu can write your own
graphic programs.
(For more involved programs, sec Apiwndix
A.)
Control Codes
CHK$
(8)
Backspace (Text Mode)
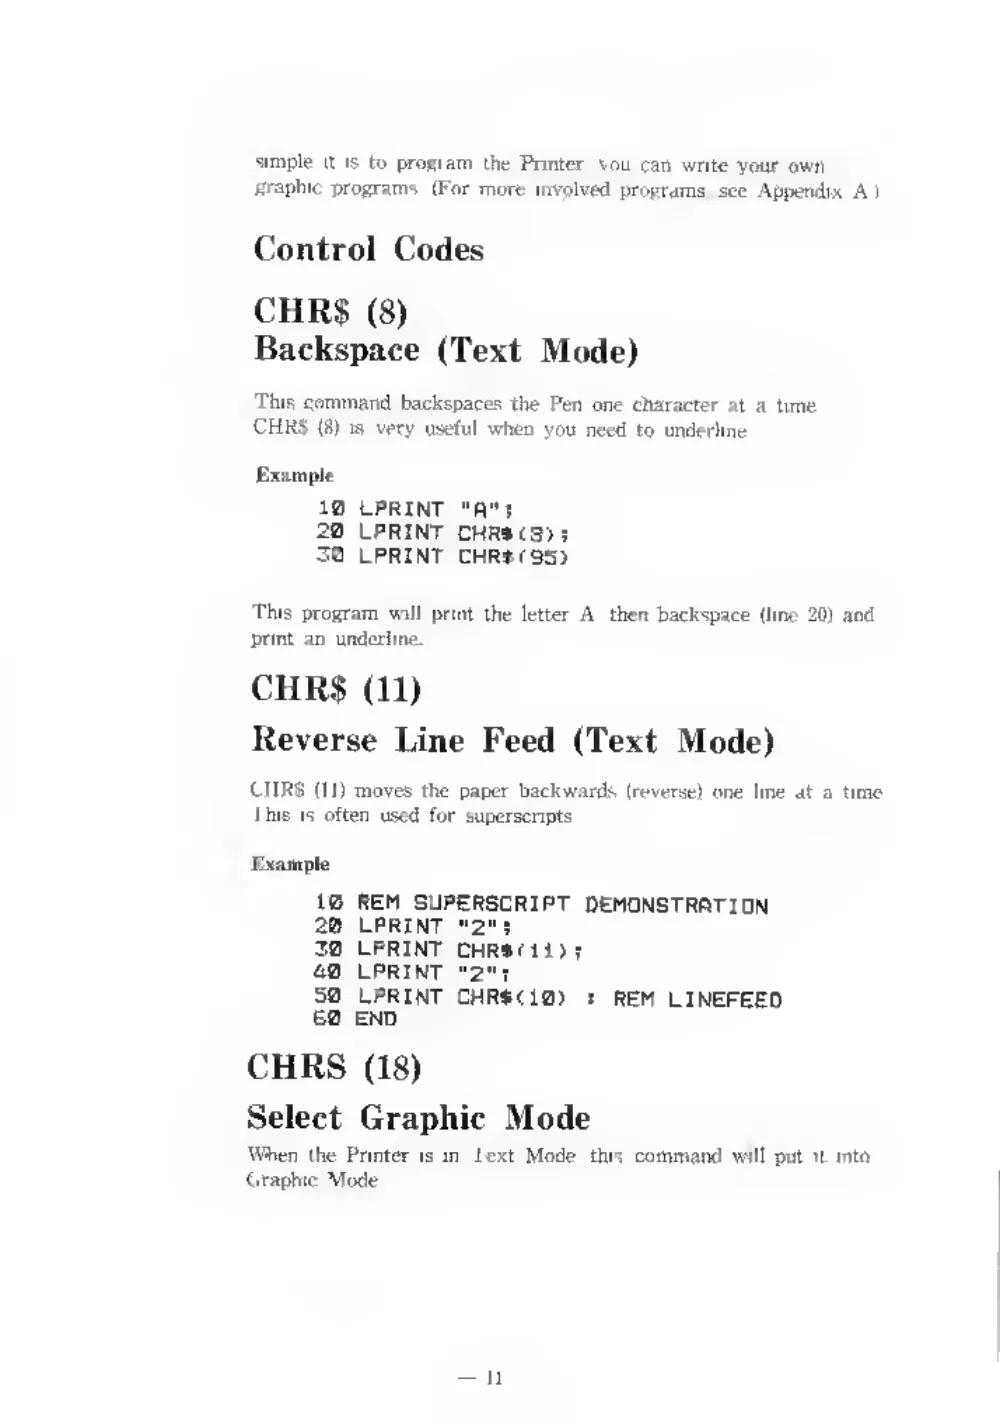
This command backspaces the Pen one character
at
a
lime.
CHK$
(S)
ia
very
useful when you need to underline.
Example
10 LPHINT
"R"
!
20 LPRINT CHR»CS)
S
30 LPRINT CHRSfSS)
This program
will prim the
letter A,
then backspace
(line 20| and
print an underline.
CHK$
(11)
Reverse Line Feed (Text Mode)
CIIRS
(11) moves the paper backwards
(rererse) one
line at
a time.
This
is often used
for
superscripts.
10 REH SUPERSCRIPT DEMONSTRfiTION
20 LPRINT
•’2"
?
30 LPRINT CHRSdl
>
t
40 LPRINT
'2"?
50
LPRINT CHR$<10)
!
REM LINEFEED
80 END
CHRS
(18)
Select Graphic Mode
IWien
the Printer
is
in Text Mode,
this command
will put
it
into
(iraiihic Mode

Exain|>le
10 LPRINT CHR»( 18)
CHR$
(17)
Select Text Mode
This ronimand
is used whan text niiilena!
is
to be
printed.
There arc other commands that
allnv.' you
to
print words
in
(jraphic Mode, but CHKS
(17)
is
the
easiiesl way to change
to
Text Mode and
print text beiween graphic material
Kxample
20 LPRINT CHRSC17)
CHR$ (29)
Rotate Pen Holder (Text Mode)
'ITiis command advances the Pen Holder one color. CHR$
(2S))
used
lo change color from Text Mode and you
Tiiiist keep trac
what color
is next.
If you want
a color
beyond the next
I’oedi
vou may
use
the command more than onece.
Example
10 LPRINT CHR6C29)
Graphic Commands
The
following commands can be used
in (iraphic Mode only.
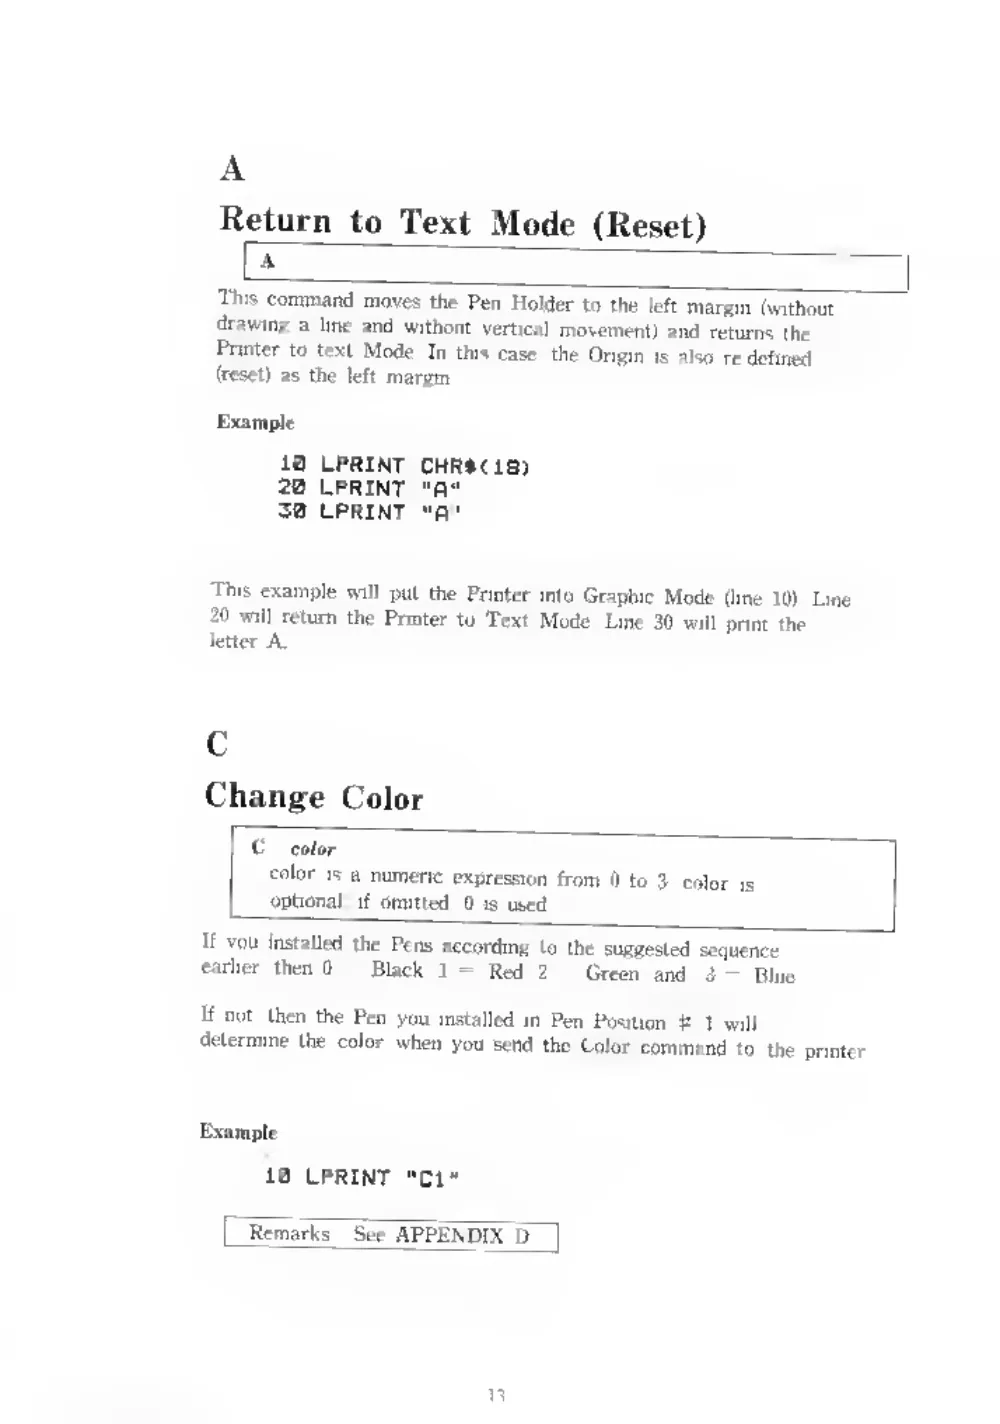
A
Return
to Text Mode (Reset)
Thi<i command moves
the Pen Holder to
the
left margin (without
drawing a
line and
without
vertical movement) and returns
the
Printer to
text Mode.
In
this case, the Origin
is
also re-dcfmed
(reset) as the
left
margin.
Example
10 LPRINT CHR»<1S)
20 LPRINT
"fl"
30 LPRINT
"R"
This example
will
pul
the
Printer inlu Graphic Mode
(line
10).
Lit
20
will
return the Printer to Text Mode. Line 30
will prim
the
letter A.
c
Change Color
color
IS
a numeric
expression front
ft
to
3
• color
is
optional;
if omitted,
0
is
used.
If you instaUed
Ihc Pens according
to
the suggested sequence
earlier, then
0
Black.
1 =
Red,
2
Green, and
3
Blue.
If
not, then the Pen you
installed m Pen
i*usilion P
1
will
determine the
color
whe.i you send the Color command tu
the
printer,
10 LPRINT
'‘Cl“
Remarks
: See APPEND IX D
|
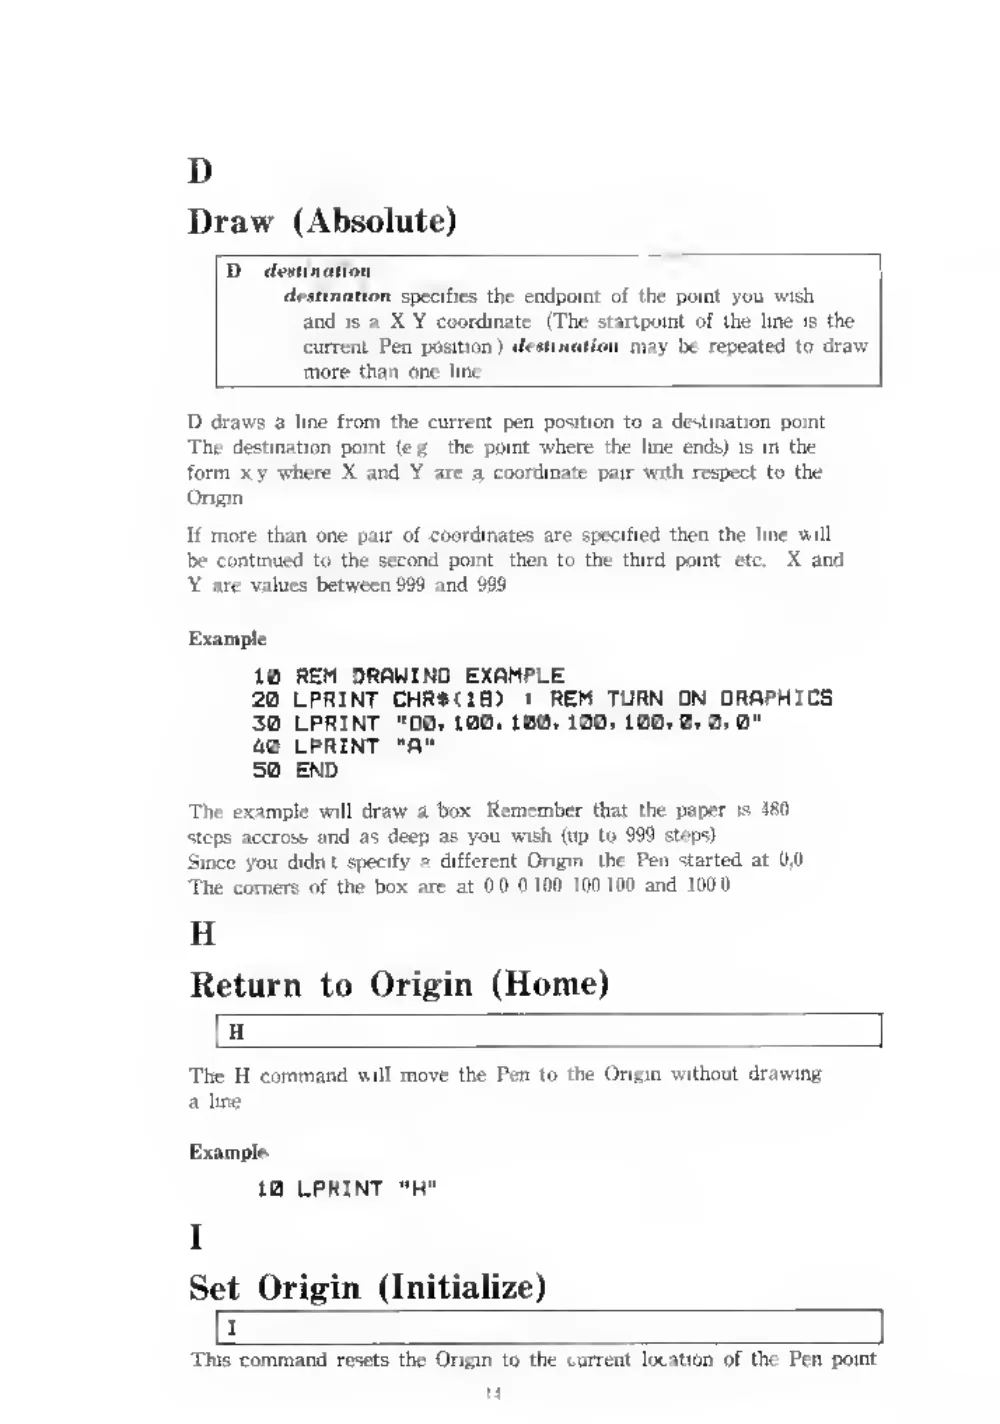
D
Draw (Absolute)
D
d^niiriiitiolt...
destination specifies the endpoint
of
the point you wish
and
is a X-Y coordinate. (The slanpoinl
ol the
line
is the
current Pen position.) detiinaiiun niay be
repeated
to draw
more than one
line.
D draws a
line from the current pen position to
a destination
point.
The destination point
(e.g.,
the point where the
line ends)
is
in the
form x.y where X and Y
are a coordinate pair with respect
to the
If more than one
pair
of coordinates are specified then the
line
will
be continued to the second
point, then to the third
point,
etc.
X and
Y arc values between.999 and 999.
Example
163
REM DRAWING EXAMPLE
20 LPRINT CHR*Cia)
!
REM TURN ON GRAPHICS
30 LPRINT
''D0. 100. 100. 100- 100T 01 0. 0"
*0 LPRINT
"A"
50 END
The example
will draw
a box. Remember that
the
paiier
is 4«n
steps accross and
a.s deep as you wish (up lo 999
steps).
Since you
didn’t
siiecify a
different
Origin,
the Pen started at
U.U.
The comers of the box are at
0,0 0,100
100,100 and
100,0,
H
Return to Origin (Home)
The
11 command
will move the Pen lo the Origin without drawing
Example
10 LPRINT
"H"
Set Origin
(Initialize)

Example
10 REM RELOCATE ORIGIN
20
LPRINT CHRSCIBJ
30 LPRINT "D240, 0"
40 LPRINT "I"
50 END
Ihifi short routine draws a
litie
to the center of the paper,then
defines the center
of the paper as the Origin.
J
Draw
(Relative)
(li'tiinniioi, specifies the endpoint of the point you wish to
draw to and
is
a X-Y
coordinate.
('The startpoint
of the
line
is the current Pen
position.) lU-^thniiion
rnay
l>e
repeated
to draw more lhan one
line.
The
J command draws a
line from the current Pen position to an end
point. The end point
is determined dy measuring up X
units and
right
\
units,
(nr
left and down
if X and Y are negative).
Once ihe Pen
is
at
this new
position,
the
line can
be continued
(o
another
point by supplying another pair of X-Y
values. The new
iwint
is measured from the previous
point, and
not from the
original
pen |»sitioa
X and Y must
be
in the range-999
to
999.
Example
10
REM RELETIVE DRAWING
20 LPRINT CHRSdS)
30 LPRINT
"J0. 1001 100, 0, 0, -100, -100, 0"
40 END
This draws the same box as the sample
for the D command, but
specifies the corners
differently. Read
line 30
like
this:
"From where you
are, draw
a
line to the point
that
is
0 steps to the
right
(in the X-direction) and 100 steps up
(in the Yalirection).
Then
from
that
point, draw
a
line that
is 100 steps to Ihe
right and
0 steps
up, then
a
line from that
is
0 steps to the
right and
ion steps down.
Finally draw a
line that
is
100 .steps
to the
left and
0 .steps up."


F.sainple
10
REM LINE SSMPLE
PROGRAM
20 LPRINTCHRsaSi
?0 LPRINT ''L3"
4B LPRINT "J430.0"
50 LPRINT "0"
EB END
Line 30
sets the
line type
to
3. The program will draw
a dotted
line
aertiss
ttie
pajier. Add an
iiialniclioti U) diange
the
Color
if you wish.
P
Print Text Characters
The r eoininand
lets you
piiot either alpha-
or numeric -chai'acters
while
in Graphic Mode without
first returning to Text Mode.
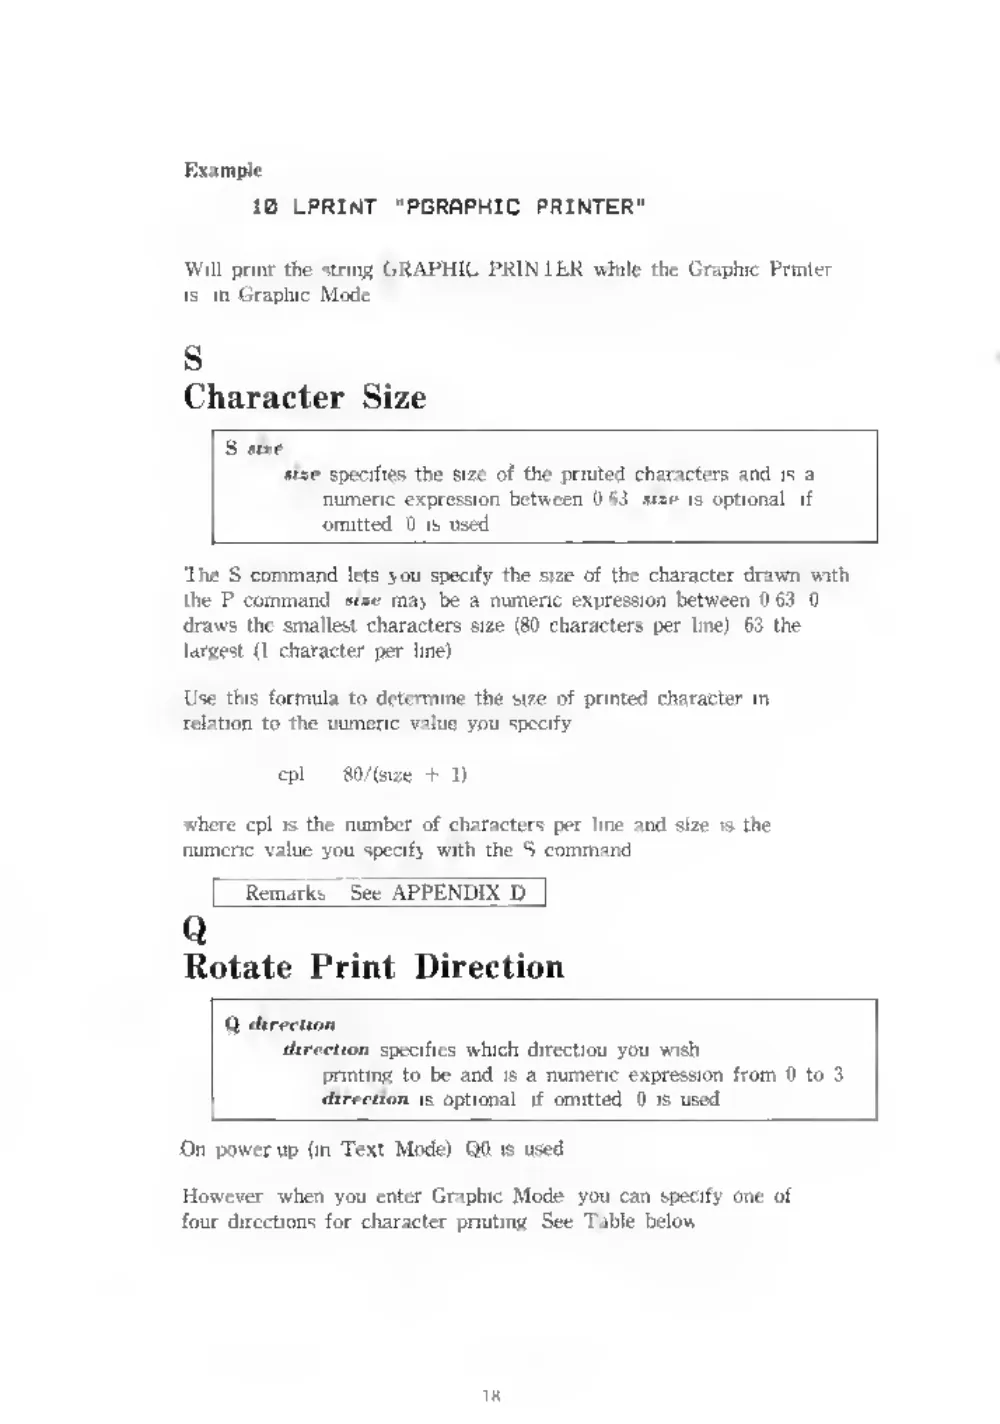
IB LPRINT
"PGRfiPHIC
PRINTER"
Will print the
striiiE (IKAl’llIC PKINTEK while the Graphic
Printer
is
in Graphic Mode.
s
Character Size
Ktse
specifies the
size
of the printed characters and
is a
numeric expression between
0-63.
*ia''
is optional;
if
omitted,
U
is used.
The S command
lets you specify the size of the character drawn with
the P command, sise may be a numeric expression between
0-63, 0
draws the smallest
characters size
(80 characters per
line),
63
the
largest
(I
character per
line).
Use
this formula
to determine the
size
of printed character
in
relation to the numeric value you
specify:
cpI
80,'(size
8-
1)
where
cpl
is the number of character.s per
line and
size
is the
numeric value you specify with the S command.
r
Remarks
: Sec APPENDIX D
|
Q
Rotate Print Direction
Q ilirfi'U'in
fiireclion
specifies which direction you wish
printing to be and
is a numeric expression from
0 to
3.
dirprtion
is
optional;
if omitted, 0
is used.
On
ijower-up
(in Text Mode), QO
is
used.
However, when you enter Graphic Mode, you can specify one of
four dircctinns for character
printing. See Table below.

For instance, using the word JO.N
as an example:
' Qh
(Icft-toriBht) would produce .lON.
• Q1 (top-tu-bottom) would
print
he
• Q2
(right-le/t) would produce NOr
* QH ibollom-to-top) would
print
7;O
Example
0 REM WRITING SIDEWBYS
a
t-PRINTCHRSClS)
2 LPRINT "M50. 0“
1
REK BLLDW LEFT MOBGIN
a WPUT''TYPE YOUR NAME
"
!N*
1
‘
'OUR NAME
a
‘
CHANGE DIRECTIWJ
a
, d2
'OUR NAME
a
‘
UPSIDE DOWN
I
WRJTE VOUR NAME
a
wPRINT"Q3..
,
REM CHANGE DIRECTION
'
REM WRITE YOUR NAME
sS
,
TO RIGHTSIDE
UP
50
END**^^
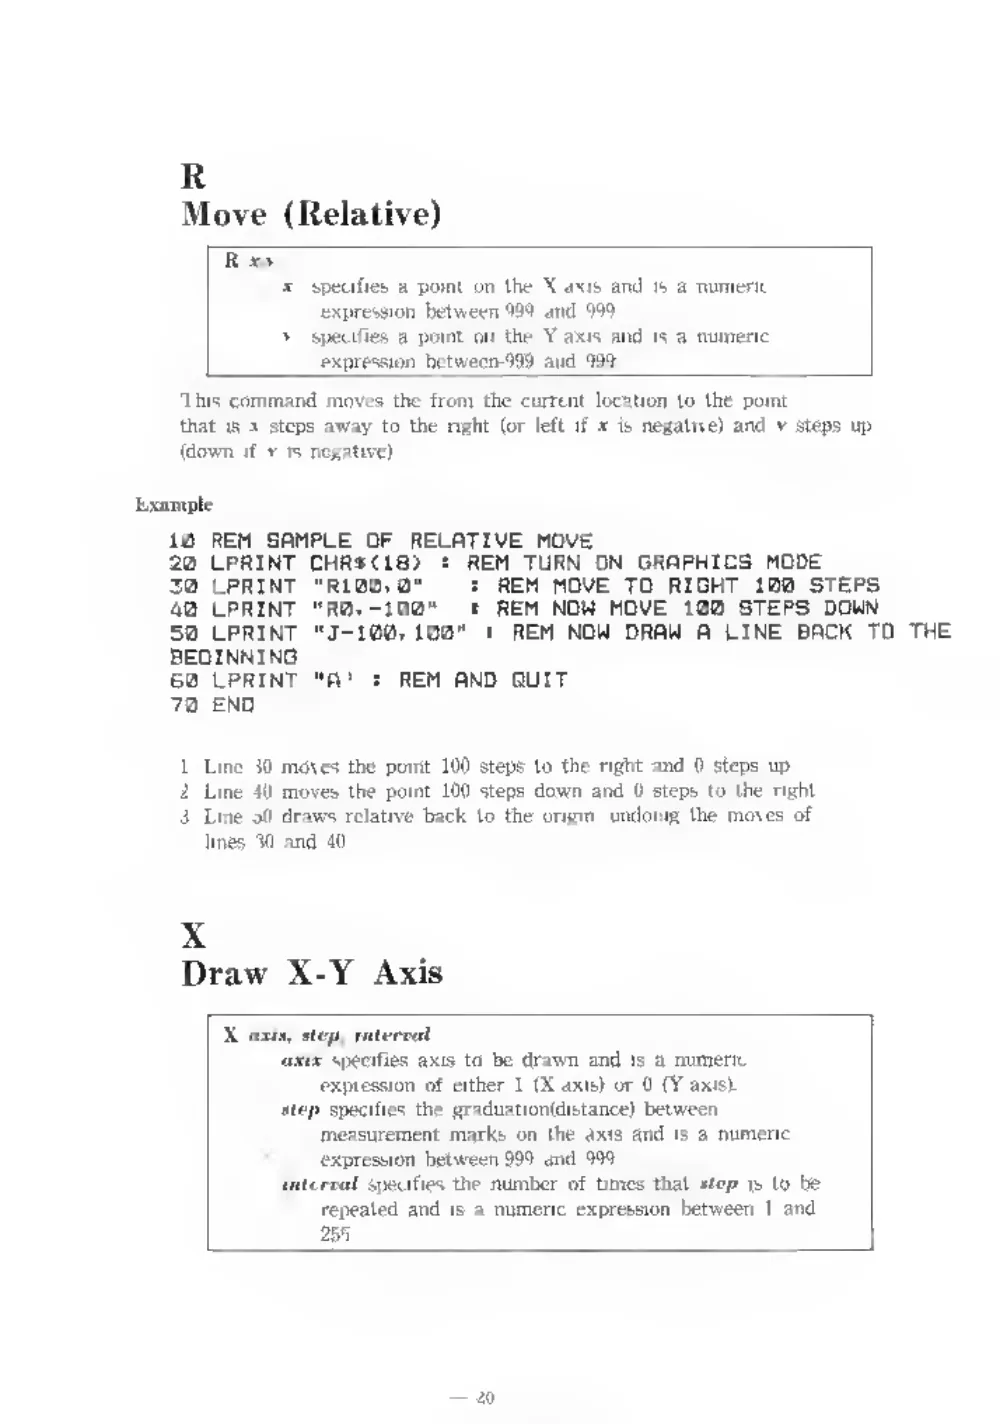
Move (Relative)
This command mows the from the current location to the point
that
is J steps away to the
right
(or
left
if r
is negative) and
>• steps
u|)
tdown
if
,v
is negative).
nple
0
REM SAMPLE OF
RELATIVE MOVE
’0 LPRINT CHR»<18)
’
REM TUR^ ON GRAPHICS MODE
10 LPRINT
"R100.0"
:
REM MOVE TO
RIGHT
100 STEPS
10 LPRINT
"R0. -100"
t
REM NOW MOVE
100 STEPS DOWN
i0 LPRINT
'‘J-100. 100"
I
REM NOW DRAW
A LINE BACK
TC
)EGINNIN3
10 LPRINT
"A"
!
REM AND QUIT
’0 END
1. Line SO moves the point
100 steps
to the
right and
0 steps
up.
2. Line 40 moves the point
100 steps down and
0 steps
to
the
right.
J. Line
oti draws relative back to the
origin, undoing the moves of
lin&s M and
40.
X
Draw X-Y Axis
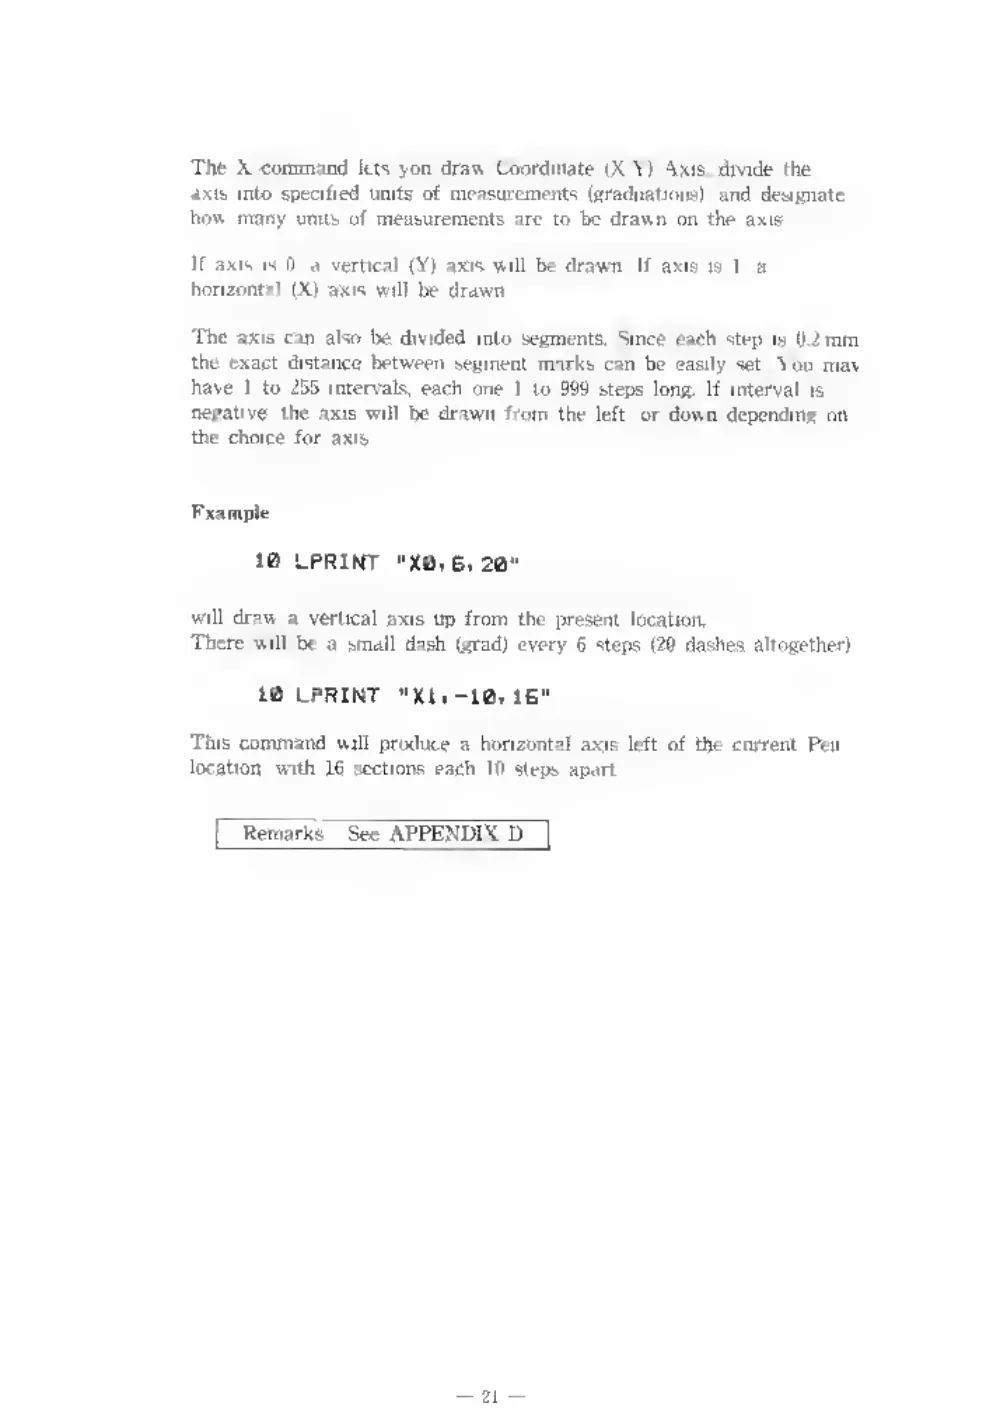
The X command
lets you draw Coordinate (X-Y) Axis, divide
the
axis inU) specified units
of measurements
(cradiialionsl, and designate
how many units
of measurements are to be drawn nn the
axis-
If axis
i.s
il.
a
vertical
(Y'l axis will be drawn.
If axis
is
1.
a
honzoiital
(X) axis
will
lie drawn.
The axis can
also be divided
into segments.
Since each step
is
0.2,ram,
the exact distance between segmenl marks can bo
easily
set. You may
have
1
to 255 inrcrvals, each one
I
to
91)9 steps
long.
If
interval
is
negative,
the axis will bo drawti from the
left, or down depending nn
the choice
for
axis.
Kxampie
10 LPRINT
"X0. 6. 20"
will draw a
vertical
axis up from the present
localion.
There will be a
small dash (grad) every
fi
stejxs
(20 dashes altogether).
10 LPRINT
"XI, -10,16"
This command
wall
(iriHluce
a
horizontal axis
left
of the current Pen
location, with
1C scctioas each
Ifl steps
apart.
Remarks
: See APPENDIX D
|
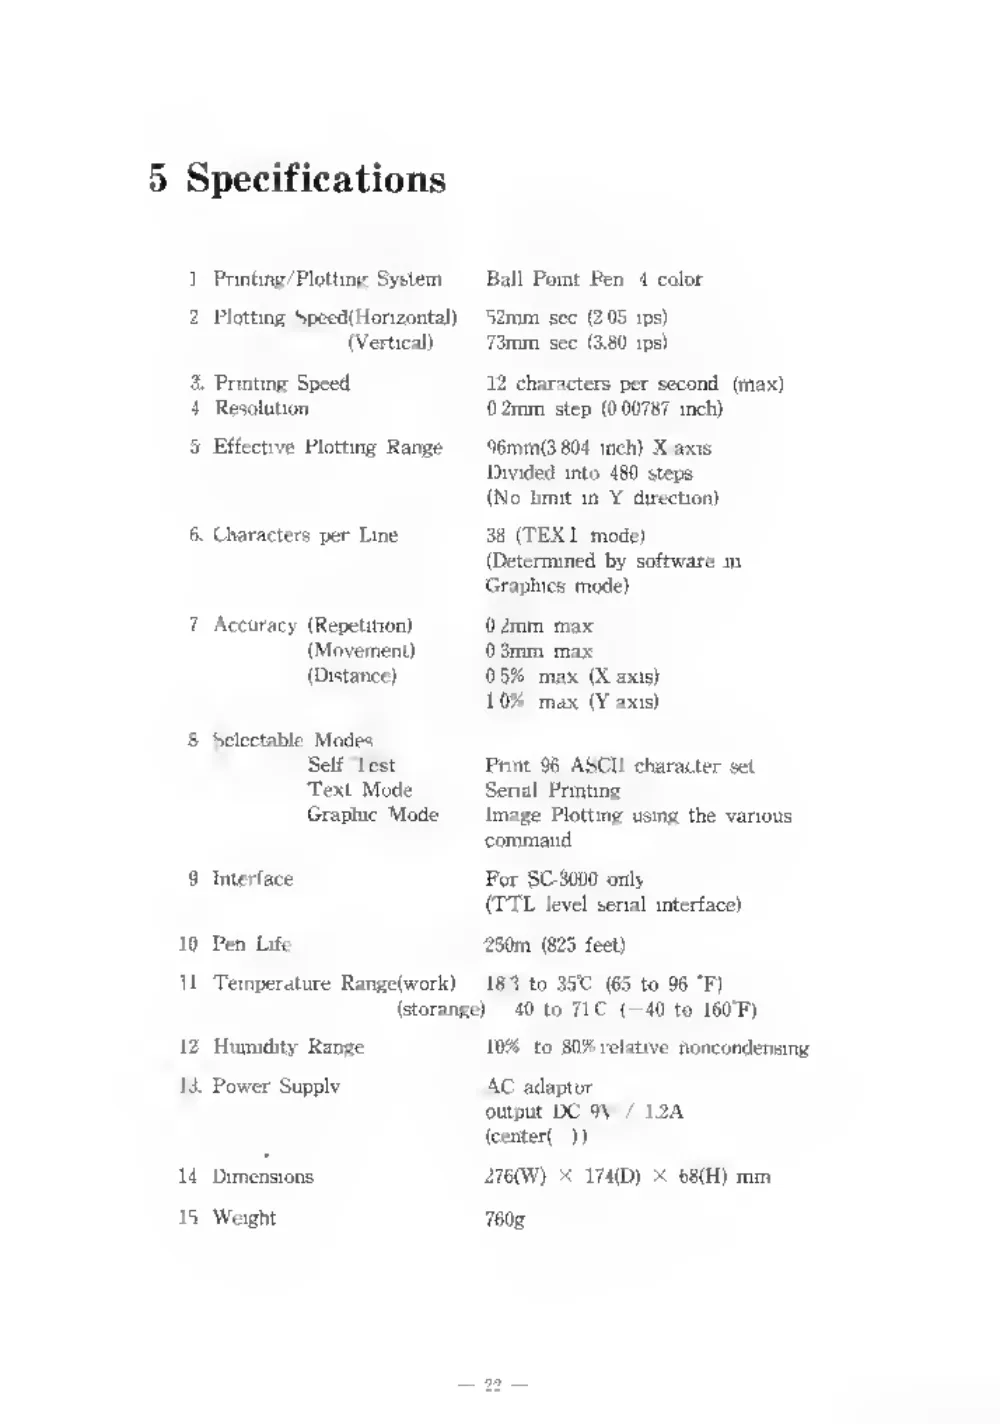
5 Specifications
1. Prirting'PUuting System
Ball Point
Pen,
1
2. Plotting Spccd(ilorizonta!l
r)2mm see
(2.05
ii
j. Effectit'C Plotting Kange
'
Acciitacy (Repelilionl
(Movernenl)
(Distance)
!l6mm(3.804
inch) X-axis
Divided into 480 steps
(No
limit
in Y direction)
38 (TEXT mode)
(Determined by software in
Grapliics mode)
8. Selectable Modes
Self
Pest
Text Mode
Graphic Mode
Print 96 ASCII character
si
Serial
Printing
Image Plotting using the v;
command
I
Temperature Rar^e(work)
0 35r
(65
to 96 T)
(storai«e)
40
to
Tl'C
( -40 to
160‘Fl
2. Humidity Range
10%
to 80% relative noncundensiiig
Power Supply
AC adaptor
4. Dimensions
i. Weight
(center!
I
)
276(W) K
174(D)
X
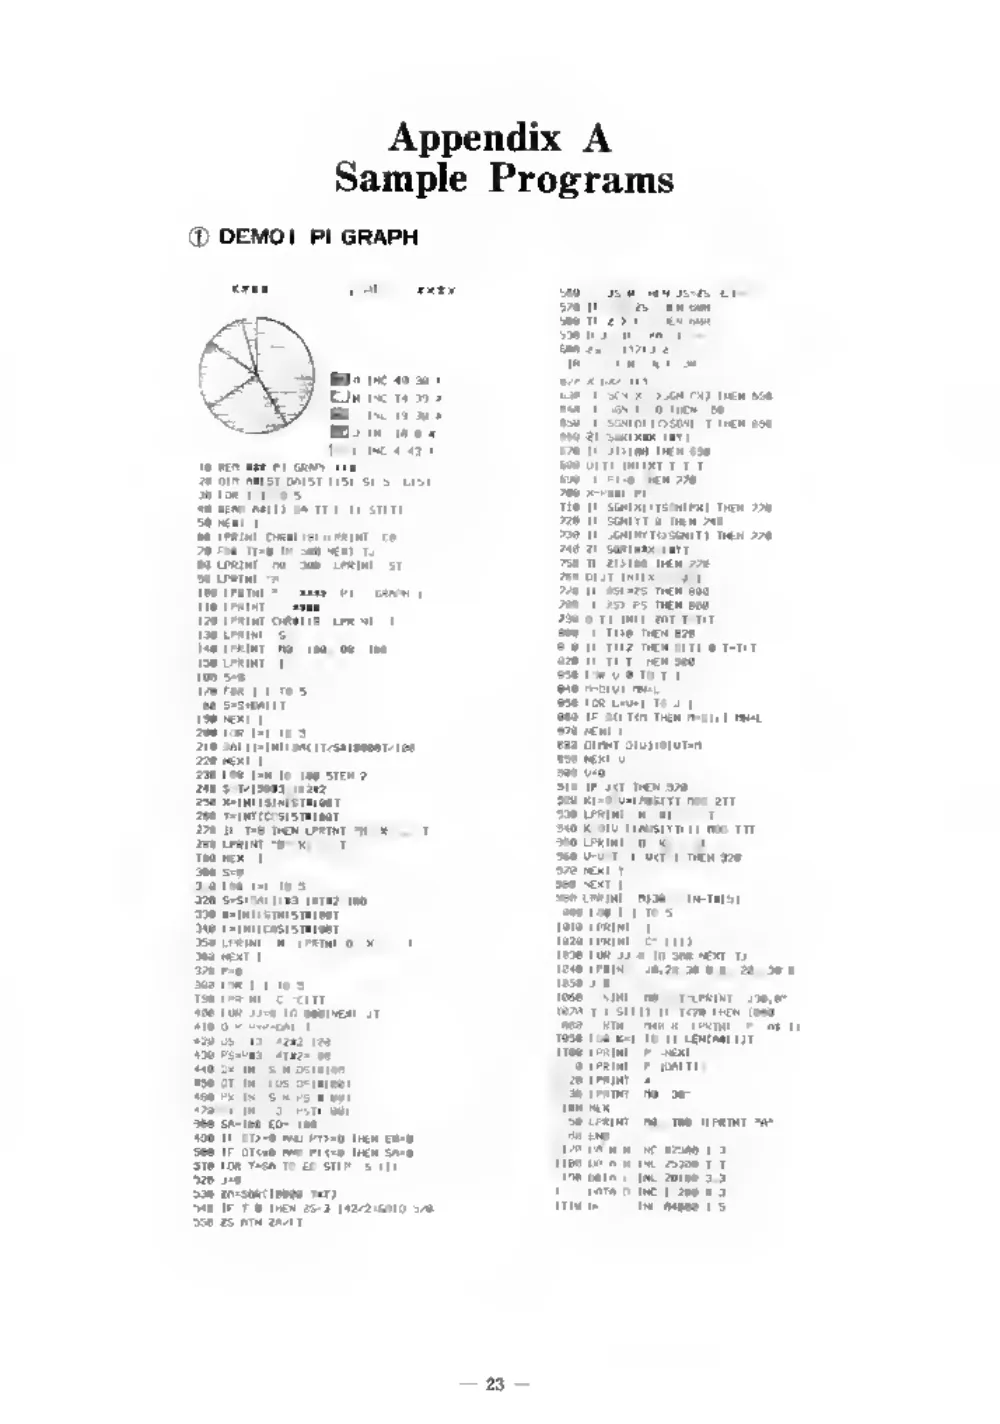
Appendix A
Sample Programs
0 DEMO
I
PI GRAPH


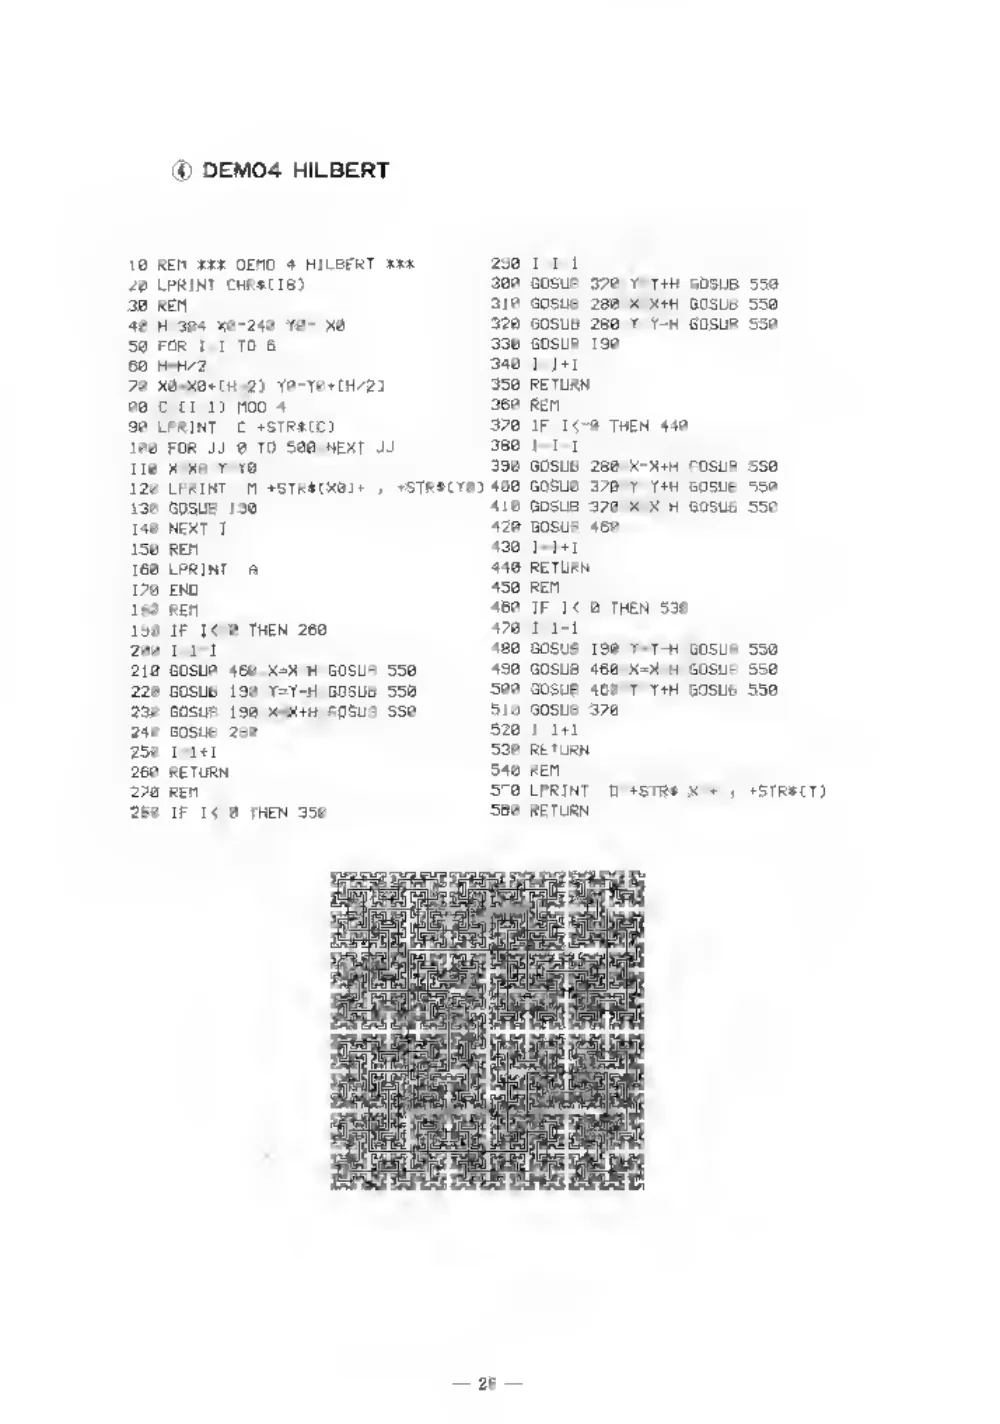
c{) DEM04 HILBERT
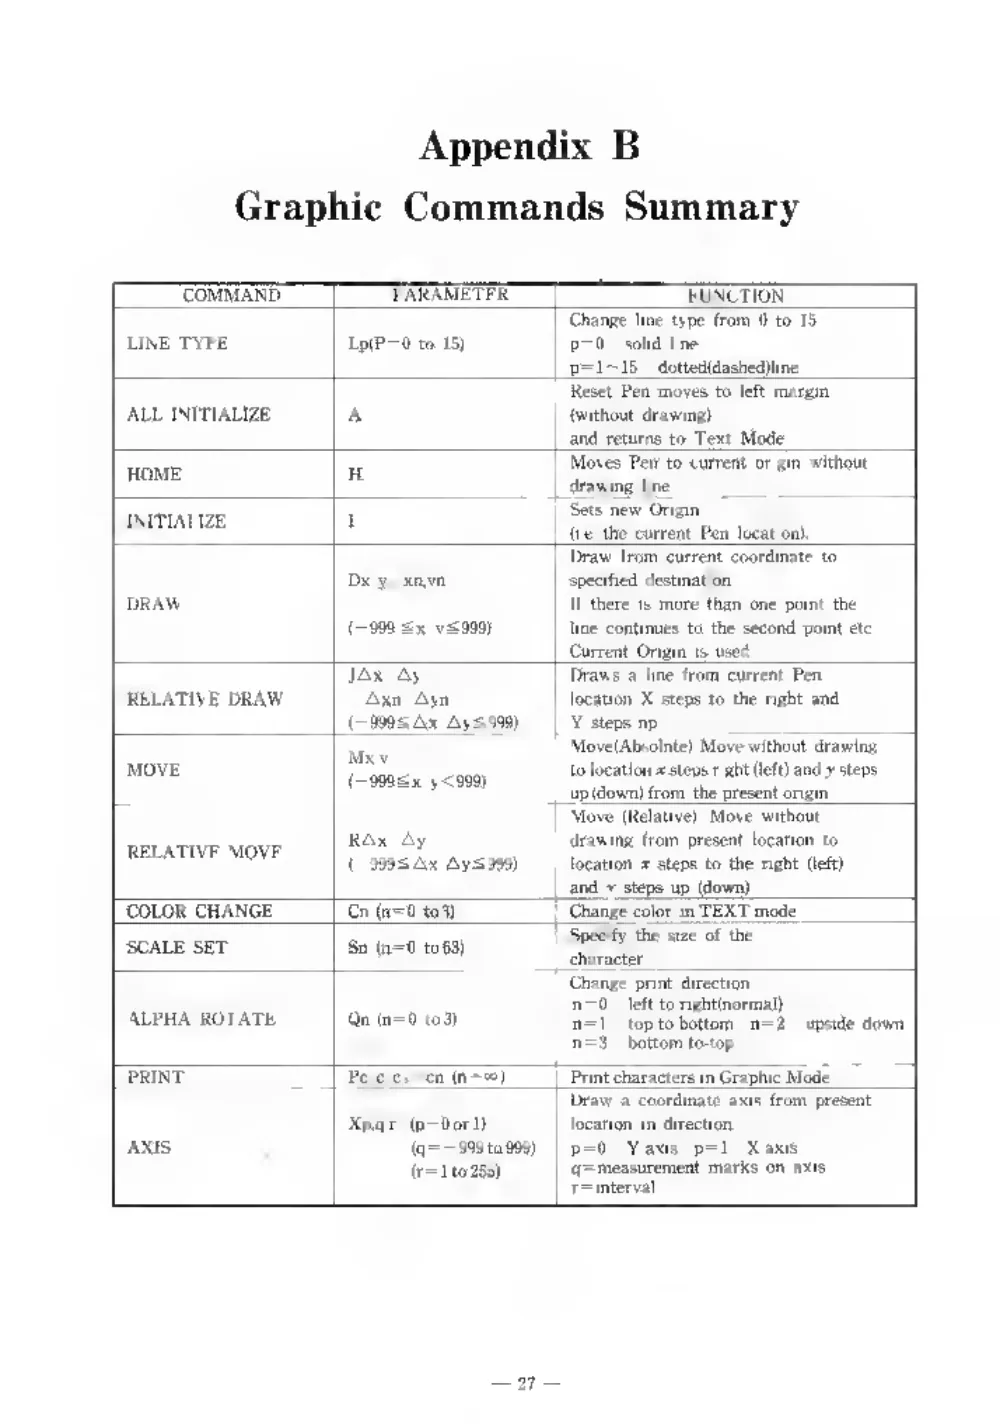
Appendix B
Graphic Commands Summary
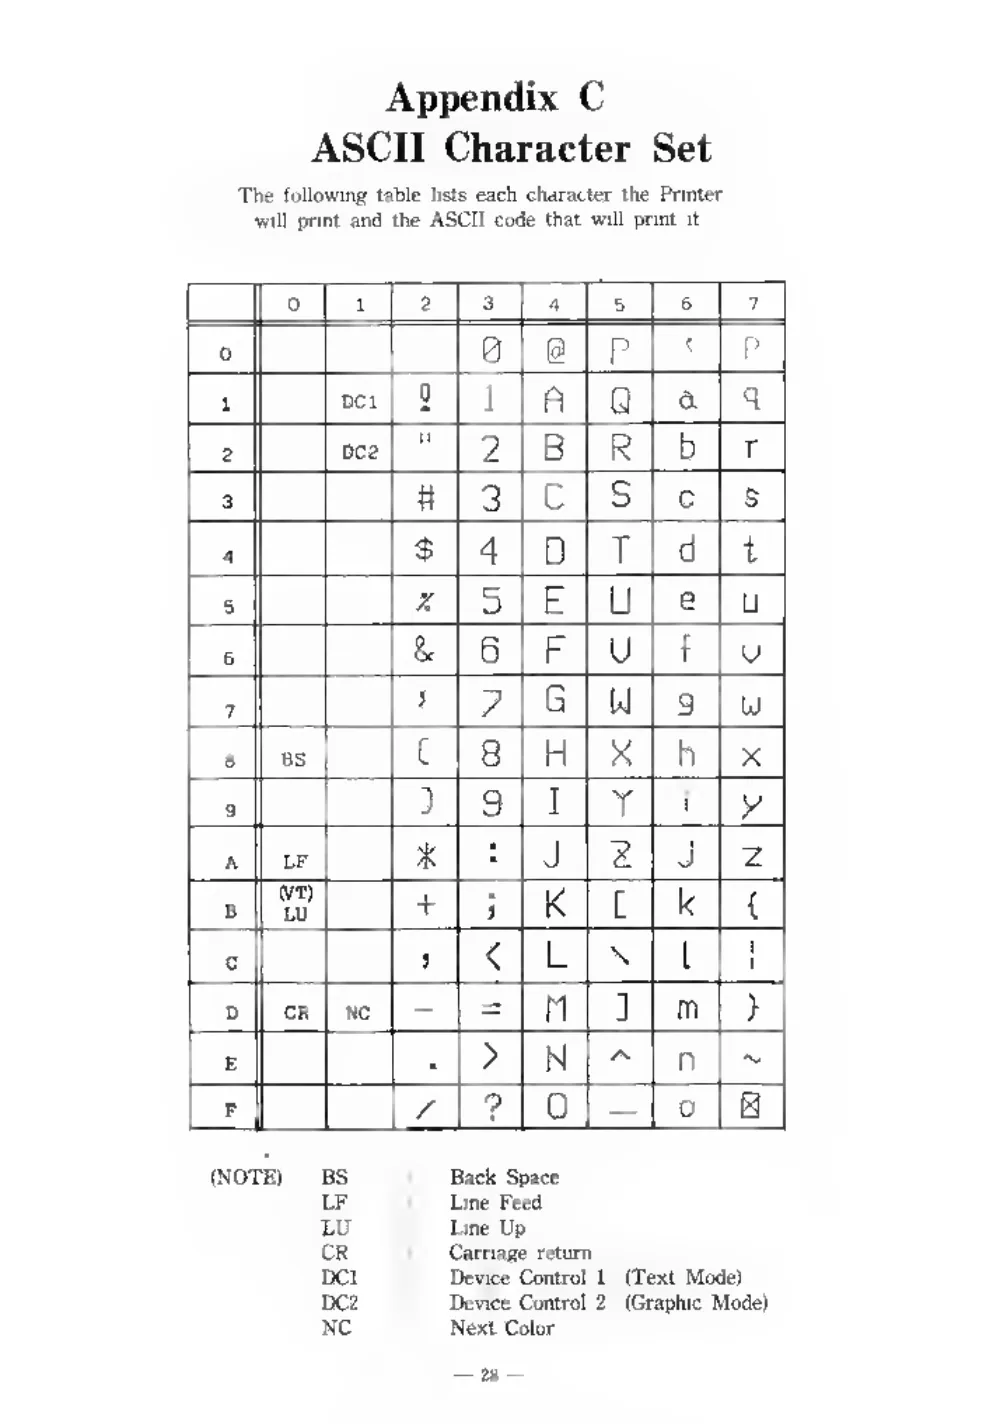
Appendix C
ASCII Character Set
The following table
lists each character the
Printer
will
print and the ASCII code that
will print
it.
1
2
3
5
7
0
0
P
u
1
DCl
g
1
A
Q
a
q
2
DC2
2
B
R
b
r
3
«
3
C
S
c
s
4
$
4
D
T
d
t
5
z
5
E
U
e
u
6
B
U
f
7
G
UJ
9
U)
s
bS
8
H
X
h
X
9
9
Y
I
y
A
LF
J
2
J
z
B
''uj
+
;
K
k
{
C
<
L
1
1
D
CB
NC
-
=
n
]
m
}
E
>
N
n
P
X
0
-
0
B
(NOTE)
BS
LF
LU
CR
DCl
DCZ
NC
Back Space
Line Feed
Line Up
Device Control
1
(Text Mode)
Device Control
2
(Graphic Mode)
Next Color
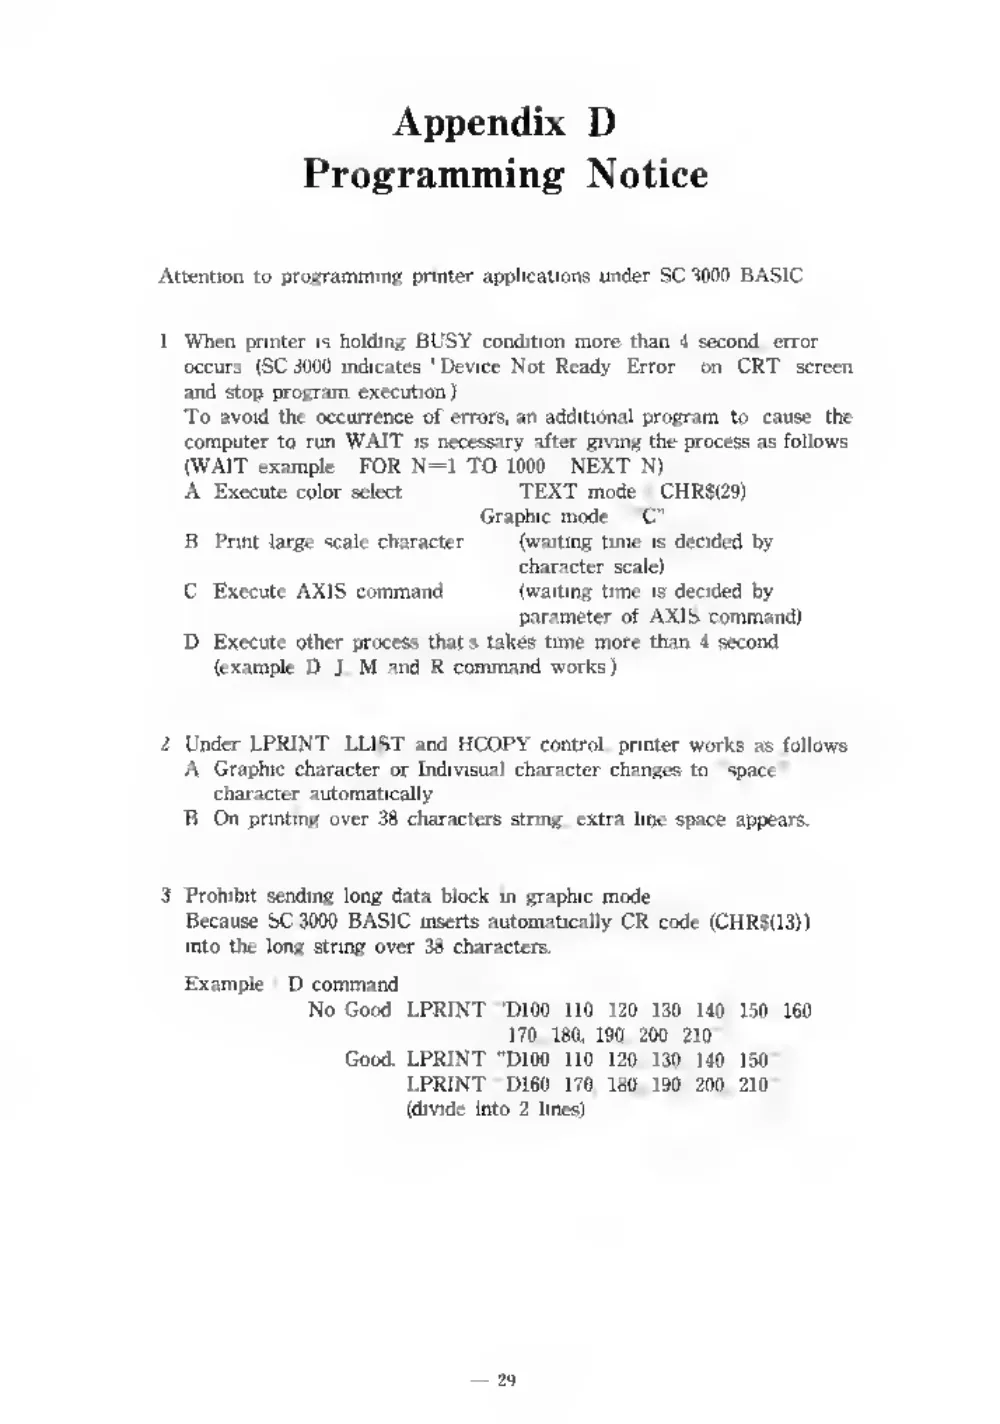
Appendix D
Programming Notice
3. Prohibit sending long data block
in graphic mode.
Because SC-3CK>0 BASIC
inserts automatically CR code (CHR$(13))
into the long string over 38 characters.
Example
: D command
No Good: I.PRINT
"DIOC,
110,
120,
130,
140,
150,
160,
170,
180,
190,
200, 210"
Good: LPRI.VT "DIOO,
110,
120,
130,
140,
150"
LPRINT "D160,
170.
ISO.
190,
200, 2in"
(divide
into 2
lines)